说到泛型,大家肯定不会陌生。这个从Java SE5引入的新特性为我们的开发提供了极大地方便。一方面,使得我们可以对于不同数据类型的通用操作统一放在一个类或方法中去定义、实现,而无需针对每种不同的数据类型去提供多个类或方法;另一方面,泛型编程实现了编译期的类型安全检查,以避免运行期发生类型转换异常
泛型的基本使用
泛型类
JDK中大量应用了泛型类,比如我们经常使用的LinkedList、HashMap等。其实定义一个泛型类很简单,只需在类名后声明类型变量,多个类型变量之间使用,逗号分隔,并用<>尖括号括起来即可。一般地类型变量使用大写字母表示。通常,任意类型一般可命名为T,集合元素的类型常用E表示,映射的键、值类型常用K、V命名
这里我们定义了一个泛型类Pair,我们可以直接在成员变量及方法中使用泛型类的类型变量T
1
2
3
4
5
6
7
8
9
10
11
12
13
14
15
16
17
18
19
20
21
22
23
24
25
26
27
28
29
30
31
32
33
34
35
|
@ToString
public class Pair<T> {
private T first;
private T second;
public Pair() {
}
public Pair(T first, T second){
this.first = first;
this.second = second;
}
public void setFirst(T first) {
this.first = first;
}
public void setSecond(T second) {
this.second = second;
}
public T getFirst() {
return first;
}
public T getSecond() {
return second;
}
}
|
使用泛型类也很简单
1
2
3
4
5
6
7
8
9
10
11
12
13
|
public static void testPair1() {
Pair<String> pair = new Pair<>();
pair.setFirst("Bob");
pair.setSecond("Ed");
String first = pair.getFirst();
String second = pair.getSecond();
System.out.println("pair1: " + pair);
System.out.println("first: " + first);
System.out.println("second: " + second);
}
|
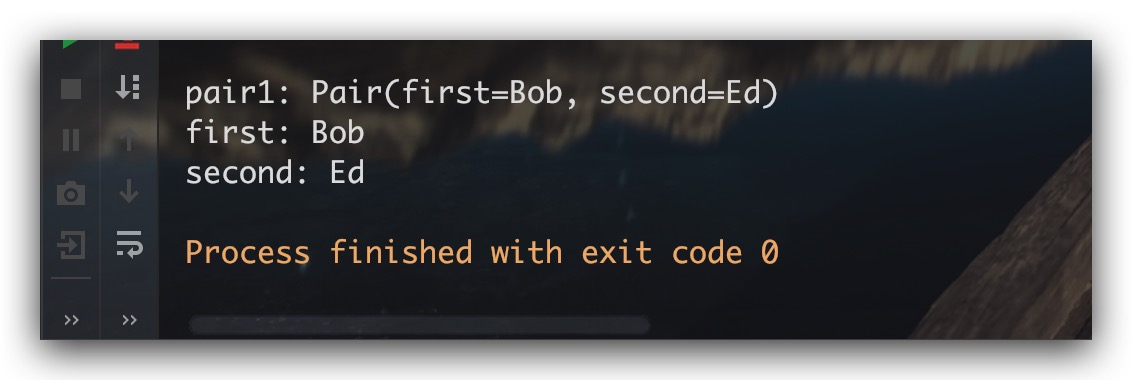
测试结果如下
泛型接口
在JDK中大量使用了泛型接口,比如我们经常使用的List、Map等。定义泛型接口与泛型类没有太大区别,只是当其他类、接口在实现、继承泛型接口时,如果没有明确泛型接口类型变量的具体参数,则其也必须一并声明定义类型变量。这里我们定义了一个泛型接口CRUDService
1
2
3
4
5
6
7
8
9
10
11
12
13
14
15
|
public interface CRUDService<T> {
int add(T record);
int update(T record);
T find(int id);
int delete(int id);
}
|
这里PersonService类实现了CRUDService接口,同时指定类型变量T的类型为Person
1
2
3
4
5
6
7
8
9
10
11
12
13
14
15
16
17
18
19
20
21
22
23
24
25
26
27
28
| public class PersonService implements CRUDService<Person> {
@Override
public int add(Person record) {
return 1;
}
@Override
public int update(Person record) {
return 1;
}
@Override
public Person find(int id) {
return null;
}
@Override
public int delete(int id) {
return 1;
}
}
@Data
class Person {
private String name;
private Integer id;
}
|
而如果没有明确类型变量T,则CommonService类依然还需要继续声明类型变量
1
2
3
4
5
6
7
8
9
10
11
12
13
14
15
16
17
18
19
20
21
| public class CommonService<T> implements CRUDService<T> {
@Override
public int add(T record) {
return 1;
}
@Override
public int update(T record) {
return 1;
}
@Override
public T find(int id) {
return null;
}
@Override
public int delete(int id) {
return 1;
}
}
|
泛型方法
泛型方法不仅可以在泛型类中定义,也可以在普通类中定义。这里我们依然在Pair泛型类中来展示如何定义泛型方法。如下所示,泛型方法可以是静态的(get),也可以是非静态的(getInfo)。对于泛型方法而言,其必须要声明类型变量 ,且位于方法修饰符(public、public static)与方法返回值之间。所以Pair中的setFirst方法并不是泛型方法,其虽然使用了泛型类所声明的类型变量T,但是其并没有声明类型变量,所以只是Pair类中一个普通的成员方法。同样地,对于泛型方法而言,其不仅可以使用泛型类所声明的类型变量,同时还可以使用其自身声明的类型变量。值得一提的是,当 泛型类所声明的类型变量 与 泛型方法所声明的类型变量 重名时,即这里都是T,在该泛型方法中的重名的类型变量均是指泛型方法的类型变量
1
2
3
4
5
6
7
8
9
10
11
12
13
14
15
16
17
18
19
20
21
22
23
24
25
26
27
28
29
30
31
32
33
34
35
36
37
38
39
|
@ToString
public class Pair<T> {
private T first;
private T second;
public void setFirst(T first) {
this.first = first;
}
...
public static <T> T get(T... array) {
return array[0];
}
public <T> void getInfo(T e) {
System.out.println("getInfo: " + e);
}
}
|
现在让我们来测试下如何使用泛型方法
1
2
3
4
5
6
7
8
9
10
11
12
13
14
15
16
17
18
|
public static void testPair2() {
System.out.println("-------- Test: getInfo Method --------");
Pair<String> pair1 = new Pair<>();
pair1.setFirst("First");
pair1.setSecond("Second");
System.out.println("pair1: " + pair1);
pair1.<Double>getInfo(1.234);
pair1.getInfo("Bob");
pair1.getInfo(true);
System.out.println("-------- Test: get Method --------");
Integer num1 = Pair.<Integer>get(3,0,1,2);
Integer num2 = Pair.get(1,2,3,4);
System.out.println("num1: " + num1 + " num2: " + num2);
}
|
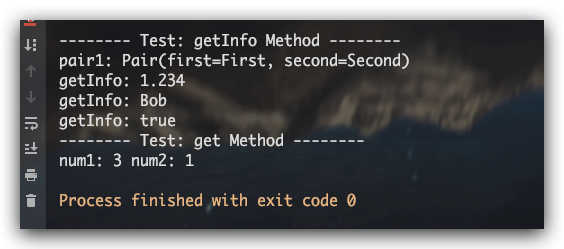
测试结果如下
泛型返回值
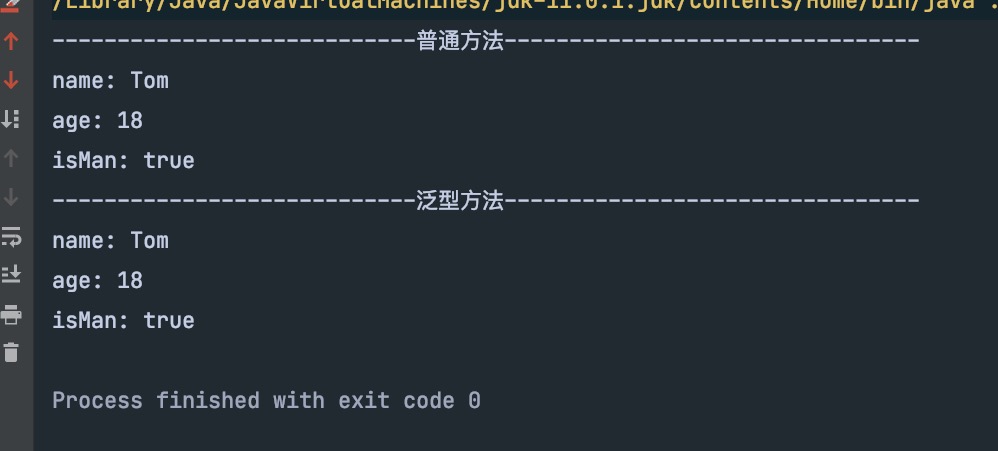
对泛型方法的返回值使用泛型参数,可以实现对泛型方法返回值的类型进行自动转换,避免外部调用方法后进行显式地类型转换
1
2
3
4
5
6
7
8
9
10
11
12
13
14
15
16
17
18
19
20
21
22
23
24
25
26
27
28
29
30
31
32
33
34
35
36
37
38
| public class ReturnTest {
public static void main(String[] args) {
System.out.println("----------------------------普通方法--------------------------------");
String name1 = (String) StuInfo.getMsg1("name");
Integer age1 = (Integer) StuInfo.getMsg1("age");
Boolean isMan1 = (Boolean) StuInfo.getMsg1("isMan");
System.out.println("name: " + name1);
System.out.println("age: " + age1);
System.out.println("isMan: " + isMan1);
System.out.println("----------------------------泛型方法--------------------------------");
String name2 = StuInfo.getMsg2("name");
Integer age2 = StuInfo.getMsg2("age");
Boolean isMan2 = StuInfo.getMsg2("isMan");
System.out.println("name: " + name2);
System.out.println("age: " + age2);
System.out.println("isMan: " + isMan2);
}
}
class StuInfo {
private static Map<String, Object> infos = new HashMap<>();
static {
infos.put("name", "Tom");
infos.put("age", 18);
infos.put("isMan", true);
}
public static Object getMsg1(String key) {
return infos.get(key);
}
public static <T> T getMsg2(String key) {
return (T) infos.get(key);
}
}
|
泛型数组
在Java中,直接new一个泛型数组是不允许的。如下述代码所示,无法通过编译。原因很简单,无法对泛型进行实例化
1
2
3
4
| public static <T> T[] createArray(int num) {
T[] array = new T[num];
return array;
}
|
再进一步介绍如何实现泛型数组前,我们来看一个示例。如下所示,其使用函数式接口IntFunction实现了创建指定容量的数组
1
2
3
4
5
6
7
8
| @Test
public void test1() {
IntFunction<Person[]> intFunction = (size) -> new Person[size];
Person[] array = intFunction.apply(5);
array[2] = Person.builder().name("aaron").build();
System.out.println("array: " + Arrays.toString(array) );
}
|
测试结果如下,符合预期

通过上面例子的启发,其为我们变相地实现泛型数组提供了一个新思路。即将数组构造器的通过IntFunction进行传递,将数组的实例化方法放在调用者层面。示例代码如下所示,可以看到工具方法list2Array支持泛型数组,而数组构造器则是通过test2调用者进行传递的
1
2
3
4
5
6
7
8
9
10
11
12
13
14
15
16
17
18
19
20
21
22
23
24
25
26
27
28
29
30
31
32
33
34
| @Test
public void test2() {
List<Person> list = new LinkedList<>();
list.add( new Person("Aaron", 25, "男") );
list.add( new Person("Bob", 21, "男") );
list.add( new Person("Tom", 33, "男") );
Person[] array = list2Array(list, Person[]::new);
System.out.println("list: " + list);
System.out.println("array: " + Arrays.toString(array) );
}
public static <T> T[] list2Array(List<T> list, IntFunction<T[]> intFunction) {
int num = list.size();
T[] array = intFunction.apply( num );
int i = 0;
for(T t : list) {
array[i] = t;
i++;
}
return array;
}
|
测试结果如下,符合预期

Note
在一个泛型类的非静态泛型方法中,如果该泛型方法没有使用泛型类的泛型参数,则该泛型方法在使用上有一些特别注意的地方。如下面的echo方法
1
2
3
4
5
6
7
8
9
10
11
12
| public class Pair<T> {
private T first;
private T second;
public <R> R echo(R r) {
return r;
}
...
}
|
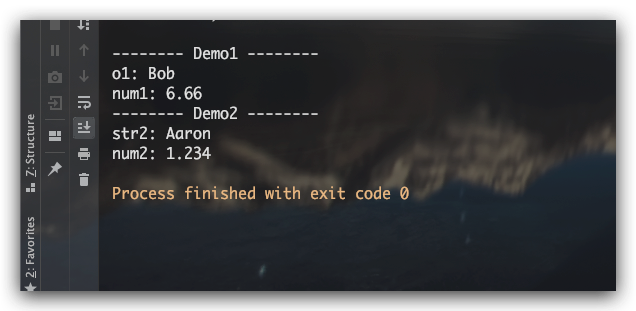
在我们通过一个Pair实例调用echo泛型方法时,该Pair实例的类型必须是泛型类型,即使我们在该方法中用不上泛型类的类型变量;否则出于对向下兼容的妥协,Java编译器(JDK8)会将该泛型方法处理为一个普通方法,即使显式地设置泛型方法的类型变量也无效。下面即是一个该Feature测试用例
1
2
3
4
5
6
7
8
9
10
11
12
13
14
15
16
17
18
19
20
| public static void testEcho() {
Pair pair1 = new Pair();
Object o1 = pair1.echo("Bob");
Double num1 = (Double)pair1.echo(6.66);
System.out.println("-------- Demo1 --------");
System.out.println("o1: " + o1);
System.out.println("num1: " + num1);
Pair<?> pair2 = new Pair();
String str2 = pair2.echo("Aaron");
Double num2 = pair2.echo(1.234);
System.out.println("-------- Demo2 --------");
System.out.println("str2: " + str2);
System.out.println("num2: " + num2);
}
|
测试结果如下
类型限定
很多时候,我们需要能够对类型变量进行一定的约束限定。这里我们以泛型方法的类型变量限定为例进行介绍,泛型类的类型变量的限定与之一致。我们向Pair类中添加了一个新的泛型方法minmax,该方法内部会调用类型为T的temp对象的compareTo方法进行比较。那么问题来了,如何保证类型T中存在compareTo方法呢?我们知道compareTo是由Comparable接口定义的一个方法,如果类型T实现了Comparable接口,则一定可以正常调用compareTo方法。所以这里我们通过extends来限定类型变量T必须实现Comparable接口,即要求类型T必须是Comparable的子类型
1
2
3
4
5
6
7
8
9
10
11
12
13
14
15
16
17
18
19
20
21
22
23
24
25
26
27
28
|
public class Pair<T> {
public static <T extends Comparable> Pair<T> minmax(T... array) {
if( array==null || array.length==0 ) {
return null;
}
T min = array[0];
T max = array[1];
for(int i=1; i<array.length; i++) {
T temp = array[i];
min = temp.compareTo(min)>0 ? min : temp;
max = temp.compareTo(max)>0 ? temp : max;
}
return new Pair<>(min, max);
}
}
|
具体地,我们可以在类型变量的声明处施加多个类型限定,限定类型之间使用&进行分隔。其中接口限定的数量没有限制。而类限定最多只能有一个,且必须位于限定类型列表的最前面。语法实例如下所示
1
2
3
4
|
T extends Comparable & Serializable
T extends ArrayList & Comparable & Serializable
|
现在来测试下我们新加入的限定的泛型方法
1
2
3
4
5
|
public static void testPair3() {
Pair<Integer> pair = Pair.minmax(4,1,3,8,6);
System.out.println("pair: " + pair);
}
|
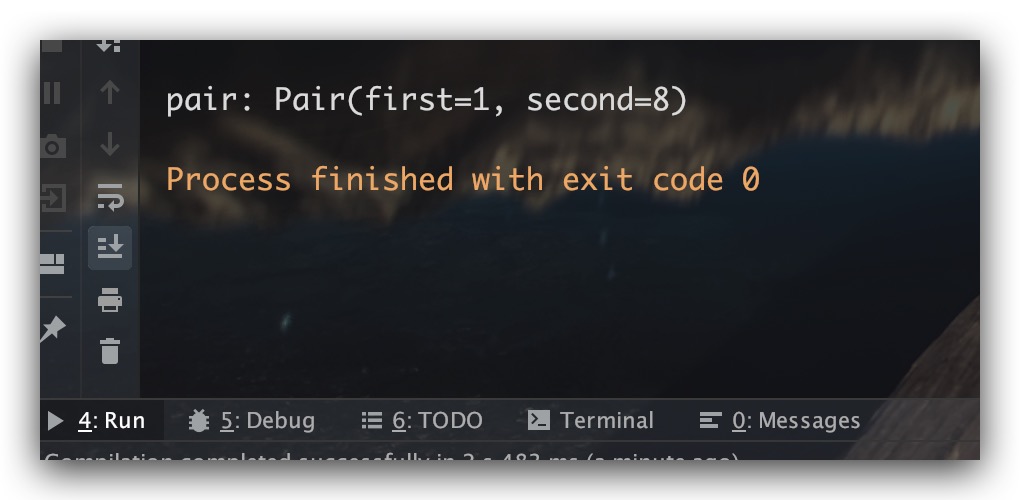
测试结果如下
参考文献
- Java核心技术·卷I 凯.S.霍斯特曼著


