本文对线程的生命周期及转化过程进行介绍,具体介绍Java多线程中的notify-wait机制并据此实现一个典型的生产者-消费者模型,并就实现线程停止的中断机制做简要说明

线程的生命周期
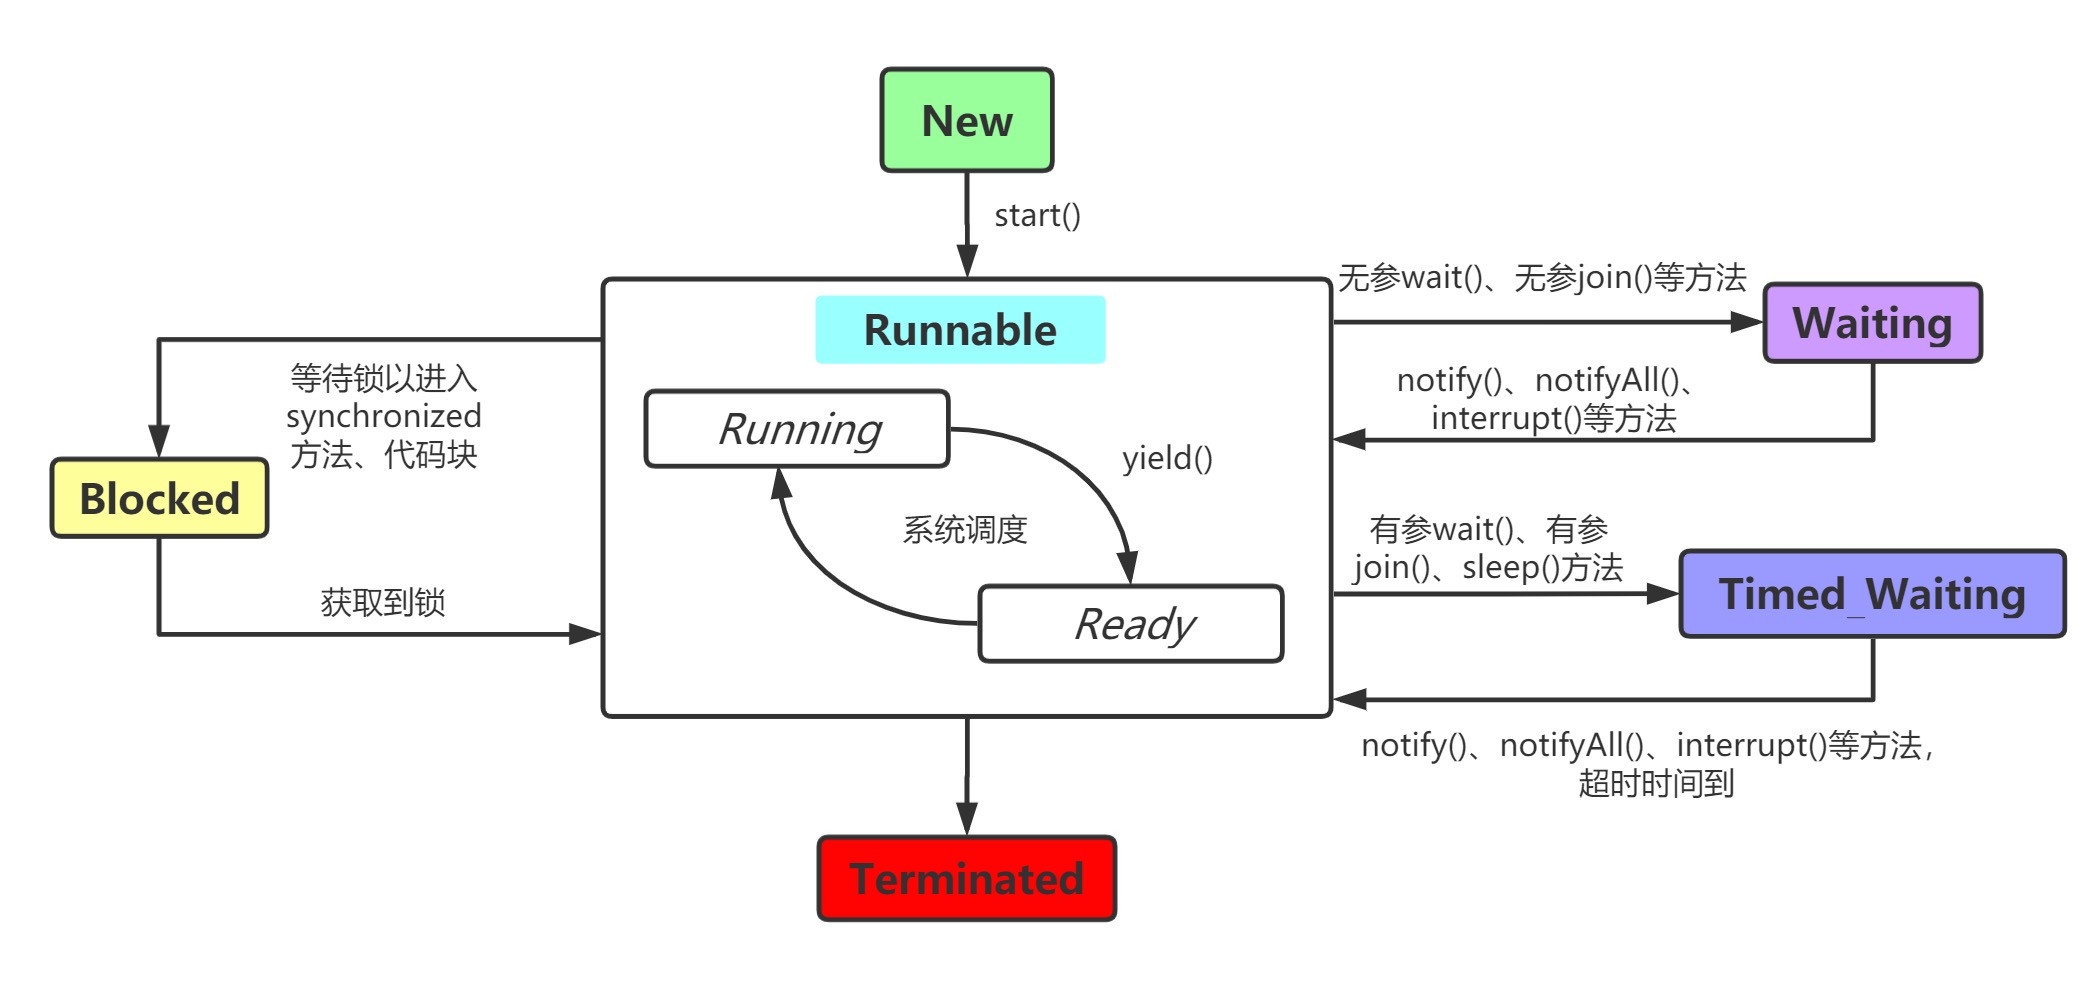
Java线程的生命周期有六种状态:
- New 新建:线程被创建但还未启动。即线程实例未调用start()方法
- Runnable 可运行:实际上在Java线程的可运行状态具体包含为两种:Running运行中、Ready就绪。前者指已经获得CPU时间片正在运行的线程;而后者则是指线程已经准备就绪,随时等待被CPU分配时间来运行
- Blocked 阻塞:线程为进入synchronized方法、代码块等待获取锁而被阻塞
- Waiting 等待:由于无超时参数的join()、wait()等方法的调用让当前线程进入等待状态,在该状态下的线程将不会被CPU调度,即无限期等待,除非被其他线程显式地唤醒(比如notify()、notifyAll()、interrupt()方法)
- Timed_Waiting 超时等待:该状态虽然也是等待,但其与Waiting状态最大的不同在于,后者是无限期等待;而前者则是有超时时间的限制。当超时时间一到,线程即会自行返回,等待被CPU分配时间片、调度执行。此种状态可通过调用设置了超时时间的join()、wati()方法、sleep()方法等方式进入
- Terminated 终止:线程终止结束
wait-notify 等待-通知机制
简介
多线程相互之间难免会需要进行通信、协作,比如在典型的生产者-消费者模型中,消费者线程需要知道队列中是否已经有产品可以进行消费了,而生产者线程需要知道队列是否已满来暂停生产。传统的做法是让消费者线程轮询检查队列中是否有产品可以进行消费。但是这样一来不够优雅,二来也是对CPU资源的极大浪费。我们期望当生产者线程在生产完成之后,能够通知消费者线程告诉它你可以来消费了。所以在Java提供了一种机制——wait-notify 等待-通知机制。具体的,是通过监视器锁的wait()、notify()、notifyAll()方法实现
- wait : 当一个线程调用监视器锁的wait()方法时,该线程将会进入Waiting状态,同时释放该监视器锁。当然一个线程只有在持有该监视器锁的条件下,才可以调用其wait()方法
- notify : 当一个线程调用监视器锁的notify()方法时,其会随机唤醒一个因为调用该监视器锁的wait()方法而进入Waiting状态的其他线程
- notifyAll : 该方法与notify()方法类似,不同点在于,其会唤醒所有因为调用该监视器锁的wait()方法而进入Waiting状态的线程
wait()、notify() 方法
现在就让我们通过一个具体的例子,来了解下wait()、notify()方法的用法
1
2
3
4
5
6
7
8
9
10
11
12
13
14
15
16
17
18
19
20
21
22
23
24
25
26
27
28
29
30
31
32
33
34
35
36
37
38
39
40
41
42
43
44
45
46
47
48
49
50
51
52
53
54
55
56
|
public static void test1() throws InterruptedException{
Object object1 = new Object();
Thread threadA = new Thread( () -> {
synchronized ( object1 ) {
System.out.println("线程 A 拿到 object1 锁");
try {
System.out.println("线程 A 开始等待并释放 object1 锁\n");
object1.wait();
}catch (InterruptedException e) {
e.printStackTrace();
}
System.out.println("线程 A 结束等待\n");
}
} );
Thread threadB = new Thread( () -> {
synchronized ( object1 ) {
System.out.println("线程 B 拿到 object1 锁");
try {
System.out.println("线程 B 开始等待并释放 object1 锁\n");
object1.wait();
}catch (InterruptedException e) {
e.printStackTrace();
}
System.out.println("线程 B 结束等待\n");
}
} );
Thread threadC = new Thread( () -> {
synchronized ( object1 ) {
System.out.println("线程 C 拿到 object1 锁");
System.out.println("线程 C 开始通知");
object1.notify();
System.out.println("线程 C 释放 object1 锁\n");
}
} );
threadA.start();
threadB.start();
Thread.sleep(2000);
threadC.start();
threadA.join();
threadB.join();
threadC.join();
System.out.println("Main Thread Over!");
}
|
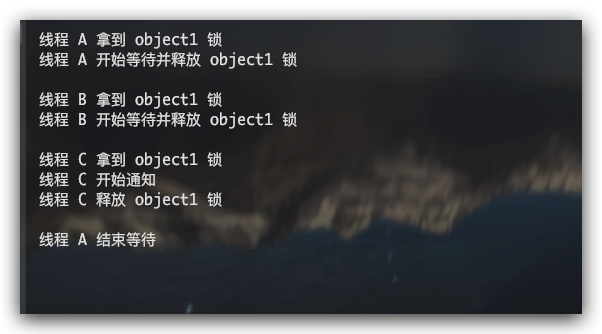
从结果我们可以看到,线程A、B通过调用锁的wait()方法后进入Waiting状态,在线程C调用notify()方法后,其将会随机的选取一个因调用object1的wait()方法而进入Waiting的线程唤醒,显然这里是A线程被唤醒了
wait()、notifyAll() 方法
那么我们现在来验证下wait-notifyAll,看看是不是会唤醒A、B两个线程
1
2
3
4
5
6
7
8
9
10
11
12
13
14
15
16
17
18
19
20
21
22
23
24
25
26
27
28
29
30
31
32
33
34
35
36
37
38
39
40
41
42
43
44
45
46
47
48
49
50
51
52
53
54
55
56
|
public static void test3() throws InterruptedException{
Object object1 = new Object();
Thread threadA = new Thread( () -> {
synchronized ( object1 ) {
System.out.println("线程 A 拿到 object1 锁");
try {
System.out.println("线程 A 开始等待并释放 object1 锁\n");
object1.wait();
}catch (InterruptedException e) {
e.printStackTrace();
}
System.out.println("线程 A 结束等待\n");
}
} );
Thread threadB = new Thread( () -> {
synchronized ( object1 ) {
System.out.println("线程 B 拿到 object1 锁");
try {
System.out.println("线程 B 开始等待并释放 object1 锁\n");
object1.wait();
}catch (InterruptedException e) {
e.printStackTrace();
}
System.out.println("线程 B 结束等待\n");
}
} );
Thread threadC = new Thread( () -> {
synchronized ( object1 ) {
System.out.println("线程 C 拿到 object1 锁");
System.out.println("线程 C 开始通知");
object1.notifyAll();
System.out.println("线程 C 释放 object1 锁\n");
}
} );
threadA.start();
threadB.start();
Thread.sleep(2000);
threadC.start();
threadA.join();
threadB.join();
threadC.join();
System.out.println("Main Thread Over!");
}
|
测试结果符合预期
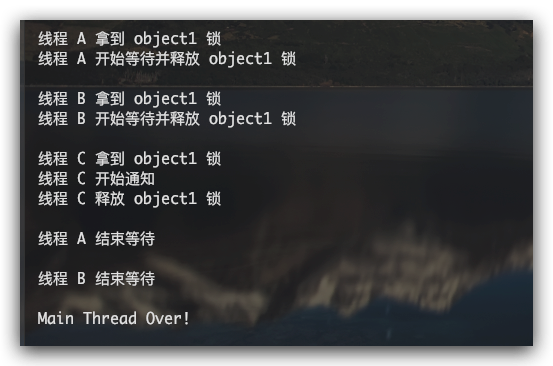
与wait方法不同的是,在执行notify()、notifyAll()方法后,锁不会自动释放。必须等执行完notify()方法所在的synchronized代码块后才释放。这一点从上面两个测试用例结果输出 [线程 C 释放 object1 锁] 信息可以看出。所以当某个线程被其他线程通过notify()、notifyAll()方法唤醒后,一般不会马上从Waiting状态变为Runnable状态,并从wait方法处返回继续执行。其一,是需要等待调用notify()、notifyAll()的线程释放锁;其二,是因为该线程被唤醒后,还需要和其他线程一起竞争锁
值得一提的是,调用notifyAll方法只会唤醒在调用该方法前已经进入Waiting状态的线程,而在这之后进入Waiting状态的线程则不会被唤醒
1
2
3
4
5
6
7
8
9
10
11
12
13
14
15
16
17
18
19
20
21
22
23
24
25
26
27
28
29
30
31
32
33
34
35
36
37
38
39
40
41
42
43
44
45
46
47
48
49
50
51
52
53
| public static void test4() throws InterruptedException{
Object object1 = new Object();
Thread threadA = new Thread( () -> {
synchronized ( object1 ) {
System.out.println("线程 A 拿到 object1 锁");
try {
System.out.println("线程 A 开始等待并释放 object1 锁\n");
object1.wait();
}catch (InterruptedException e) {
e.printStackTrace();
}
System.out.println("线程 A 结束等待\n");
}
} );
Thread threadB = new Thread( () -> {
synchronized ( object1 ) {
System.out.println("线程 B 拿到 object1 锁");
try {
System.out.println("线程 B 开始等待并释放 object1 锁\n");
object1.wait();
}catch (InterruptedException e) {
e.printStackTrace();
}
System.out.println("线程 B 结束等待\n");
}
} );
Thread threadC = new Thread( () -> {
synchronized ( object1 ) {
System.out.println("线程 C 拿到 object1 锁");
System.out.println("线程 C 开始通知");
object1.notifyAll();
System.out.println("线程 C 释放 object1 锁\n");
}
} );
threadA.start();
threadC.start();
Thread.sleep(1000);
threadB.start();
threadA.join();
threadB.join();
threadC.join();
System.out.println("Main Thread Over!");
}
|
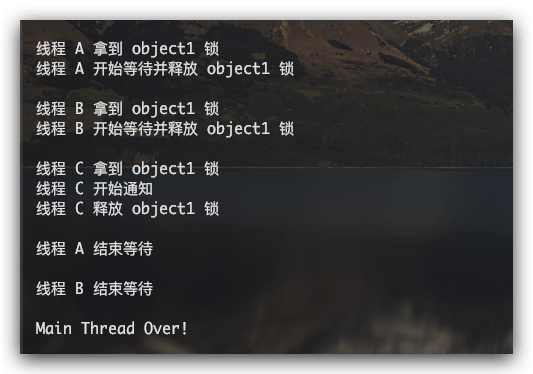
从测试结果,可以看到由于notifAll方法调用后,B线程才进入Waiting状态,故不会被唤醒

支持设置超时时间的wait()方法
其实对比上面两个测试用例test1()、test3(),我们还会发现,测试用例test1()的主线程永远不会打印: [Main Thread Over!] 。其原因在于test1()中,C线程只会唤醒A、B线程的其中一个,而另外一个线程则用会一直处于Waiting状态、无法主动被CPU调度运行,自然也就无法结束。为避免线程永久处于Waiting状态,JDK中重载了wait方法以支持设置超时时间。这样当一个线程进入Timed_Waiting状态后,如果超过超时时间后依然没有被其他线程唤醒,其会主动唤醒。下面即是一个设置了超时时间的wait()方法的实践
1
2
3
4
5
6
7
8
9
10
11
12
13
14
15
16
17
18
19
20
21
22
23
24
25
26
27
28
29
30
31
32
33
34
35
36
37
38
39
40
41
42
43
44
45
46
47
48
49
50
51
52
53
54
|
public static void test2() throws InterruptedException{
Object object1 = new Object();
Thread threadA = new Thread( () -> {
synchronized ( object1 ) {
System.out.println("线程 A 拿到 object1 锁");
try {
System.out.println("线程 A 开始等待并释放 object1 锁\n");
object1.wait(3000);
}catch (InterruptedException e) {
e.printStackTrace();
}
System.out.println("线程 A 结束等待\n");
}
} );
Thread threadB = new Thread( () -> {
synchronized ( object1 ) {
System.out.println("线程 B 拿到 object1 锁");
try {
System.out.println("线程 B 开始等待并释放 object1 锁\n");
object1.wait(5000);
}catch (InterruptedException e) {
e.printStackTrace();
}
System.out.println("线程 B 结束等待\n");
}
} );
Thread threadC = new Thread( () -> {
synchronized ( object1 ) {
System.out.println("线程 C 拿到 object1 锁");
System.out.println("线程 C 开始通知");
object1.notify();
System.out.println("线程 C 释放 object1 锁\n");
}
} );
threadA.start();
threadB.start();
threadC.start();
threadA.join();
threadB.join();
threadC.join();
System.out.println("Main Thread Over!");
}
|
测试结果我们可以看到虽然C线程只唤醒了A线程,但是B线程由于超时时间已到故也会被自动唤醒
生产者-消费者模型
既然我们已经介绍了Java多线程的wait-notify机制,那我们就通过该机制来实现一个生产者-消费者模型。在该模型中,生产者Producer负责生产,并在生产完成后通知消费者以进行消费;而消费者则负责消费,并在消费完成后通知生产者及时继续生产。值得的一提是,在生产者、消费者获得监视器锁后,必须先通过while循环判断当前角色是否应该进行生产、消费等工作,否则将继续进入Waiting状态。避免因虚假唤醒、被其他相同的角色通过notifyAll()唤醒等原因而出现生产者向已满队列继续生产、消费者向已空队列继续消费的异常现象。而所谓虚假唤醒,则是指Waiting状态的线程被自动唤醒变为Runnable状态,即使该线程未被其他线程通过notify()、notifyAll()方法进行通知,也未被中断或超时
1
2
3
4
5
6
7
8
9
10
11
12
13
14
15
16
17
18
19
20
21
22
23
24
25
26
27
28
29
30
31
32
33
34
35
36
37
38
39
40
41
42
43
44
45
46
47
48
49
50
51
52
53
54
55
56
57
58
59
60
61
62
63
64
65
66
67
68
69
70
71
72
73
74
75
76
77
78
79
80
|
public class Producer implements Runnable{
private Integer listSizeMax = 5;
private List list;
public Producer(List list) {
this.list = list;
}
@Override
public void run() {
while (true) {
synchronized (list) {
while (list.size()>=listSizeMax) {
try {
list.wait();
}catch (InterruptedException e) {
e.printStackTrace();
}
}
Integer element = new Random().nextInt(50);
list.add(element);
System.out.println(Thread.currentThread().getName() + " 生产:" + element);
System.out.println("List: " + list + " \n");
list.notifyAll();
}
}
}
}
public class Customer implements Runnable{
private Integer listSizeMin = 0;
private List list;
public Customer(List list) {
this.list = list;
}
@Override
public void run() {
while (true) {
synchronized (list) {
while ( list.size() <= listSizeMin ) {
try{
list.wait();
}catch (InterruptedException e) {
e.printStackTrace();
}
}
List tempList = new LinkedList(list);
list.clear();
System.out.println(Thread.currentThread().getName() + " 消费:" + tempList);
System.out.println("List: " + list + " \n");
list.notifyAll();
}
}
}
}
|
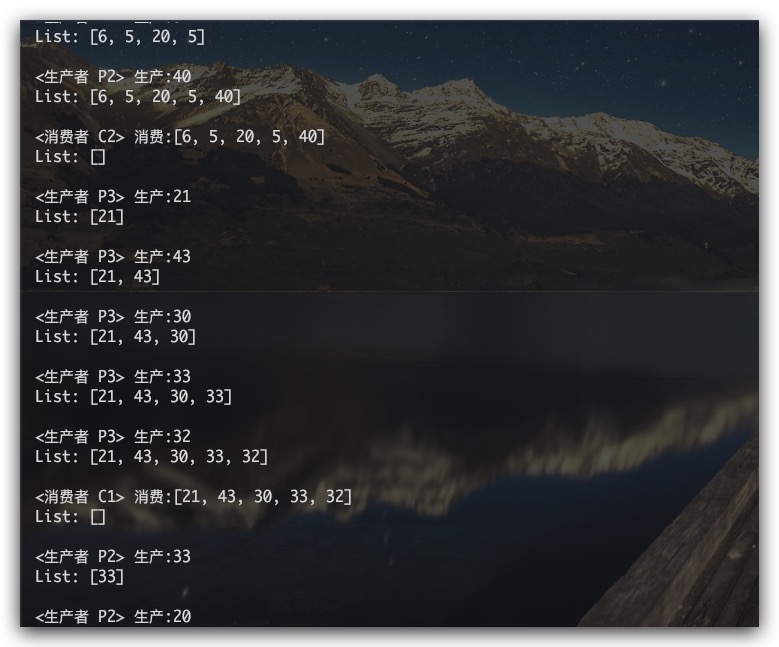
这里,我们测试一个3生产者、2消费者的模型
1
2
3
4
5
6
7
8
9
10
| public static void test1() {
List list = new LinkedList();
new Thread( new Producer(list), "<生产者 P1>" ).start();
new Thread( new Producer(list), "<生产者 P2>" ).start();
new Thread( new Producer(list), "<生产者 P3>" ).start();
new Thread( new Customer(list), "<消费者 C1>" ).start();
new Thread( new Customer(list), "<消费者 C2>" ).start();
}
|
可以看到测试结果符合我们的预期
join方法
有些场景中,主线程需要等待子线程执行结束后再继续往下执行,这个时候就可以在主线程中通过调用 subThread.join() 的方式以让主线程进入Waiting状态,当子线程subThread结束时主线程即会被自动唤醒,该方法的用法在我们上文的测试用例中已经有所体现,故此处不再赘述
sleep方法
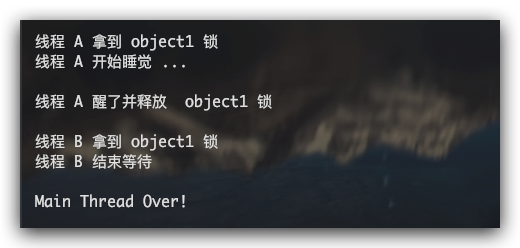
Thread中有一个静态的sleep方法,其可让当前线程立即进入Timed_Waiting状态,待超时时间一到,其会自动唤醒。即该线程在指定的超时时间内让出CPU的使用权、不参与CPU调度。但是,sleep方法并不会让该线程释放其所持有的监视器锁。该特点可通过下面的例子进行演示
1
2
3
4
5
6
7
8
9
10
11
12
13
14
15
16
17
18
19
20
21
22
23
24
25
26
27
28
29
30
31
32
33
34
35
36
37
38
39
40
41
|
public static void testSleep() throws Exception{
Object object1 = new Object();
Thread threadA = new Thread( () -> {
synchronized ( object1 ) {
System.out.println("线程 A 拿到 object1 锁");
try {
System.out.println("线程 A 开始睡觉 ...\n");
Thread.sleep(5000);
}catch (InterruptedException e) {
e.printStackTrace();
}
System.out.println("线程 A 醒了并释放 object1 锁\n");
}
} );
Thread threadB = new Thread( () -> {
synchronized ( object1 ) {
System.out.println("线程 B 拿到 object1 锁");
System.out.println("线程 B 结束等待\n");
}
} );
threadA.start();
Thread.sleep(50);
threadB.start();
threadA.join();
threadB.join();
System.out.println("Main Thread Over!");
}
|
虽然线程A进入了Timed_Waiting状态,让出了CPU的执行权,但是由于sleep方法不会释放锁。所以使得线程B也无法被CPU调度执行,只能处于Blocked状态
yield方法
在Thread中还有一个日常比较少用的静态方法——yield()方法,当线程调用该方法时,其只是告诉线程调度器,自己的CPU时间片虽然还没用完,但是我不想继续用了,你可以进行下一轮线程调度了。但是,虽然线程发出了让出CPU使用权的请求,但是线程调度器不一定会响应。如果线程调度器响应了该请求,则会将该线程的状态更改为Ready,一般地会从线程就绪队列中选一个高优先级的线程继续运行,但依然也有可能会调度选择刚刚那个主动让出CPU的线程来继续运行
下面即是一个该方法的测试用例
1
2
3
4
5
6
7
8
9
10
11
12
13
14
15
16
17
18
19
20
21
22
23
24
25
26
27
|
public static void testYield1() {
Thread threadA = new Thread( () -> {
for(int i=0; i<5; i++) {
System.out.println("线程A i: " + i);
if(i==2) {
System.out.println("线程A 主动放弃该时间片");
Thread.yield();
}
}
} );
Thread threadB = new Thread( () -> {
for(int i=0; i<5; i++) {
System.out.println("线程B i: " + i);
if(i==2) {
System.out.println("线程B 主动放弃该时间片");
Thread.yield();
}
}
} );
threadA.start();
threadB.start();
}
|
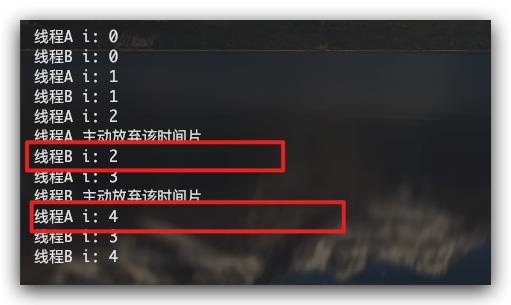
可以看到这里当一个线程申请让出CPU执行权时,线程调度器选择了另外一个线程继续执行
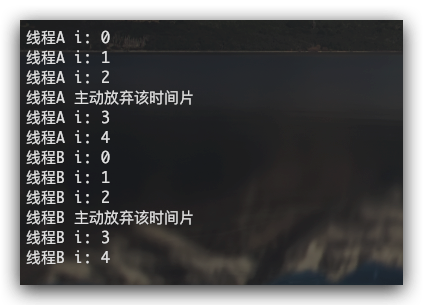
值得一提的是,即使调用yield()方法让出了CPU的使用权,并不会让该线程释放其所持有的锁。下面我们通过一个测试用例来进行说明
1
2
3
4
5
6
7
8
9
10
11
12
13
14
15
16
17
18
19
20
21
22
23
24
25
26
27
28
29
30
31
32
33
34
|
public static void testYield2() {
Object object1 = new Object();
Thread threadA = new Thread( () -> {
synchronized (object1) {
for(int i=0; i<5; i++) {
System.out.println("线程A i: " + i);
if(i==2) {
System.out.println("线程A 主动放弃该时间片");
Thread.yield();
}
}
}
} );
Thread threadB = new Thread( () -> {
synchronized (object1) {
for(int i=0; i<5; i++) {
System.out.println("线程B i: " + i);
if(i==2) {
System.out.println("线程B 主动放弃该时间片");
Thread.yield();
}
}
}
} );
threadA.start();
threadB.start();
}
|
测试结果很好的表明,当一个线程让出CPU的使用权后,由于另外一个无法获取到所需的锁,所以只能被阻塞,直到到前一个持有锁的线程执行完毕将锁释放
中断机制
强制线程停止的stop()方法由于不安全的原因已经被弃用,故Java提供一套中断机制以用于停止线程。值得一提的是中断机制不能直接停止一个线程,其只是一种协作机制。所以当一个线程被其它线程中断后,是否需要停止需要开发者自行处理。其涉及的相关方法如下所示:
1
2
3
4
5
6
7
8
9
10
11
12
13
14
15
16
17
| public class Thread implements Runnable {
public void interrupt() {
...
};
public boolean isInterrupted() {
return isInterrupted(false);
}
public static boolean interrupted() {
return currentThread().isInterrupted(true);
}
}
|
isInterrupted方法
这里,我们通过 isInterrupted() 方法来演示如果利用中断机制停止线程,实例如下
1
2
3
4
5
6
7
8
9
10
11
12
13
14
15
16
17
18
19
20
21
22
23
24
25
26
27
28
29
|
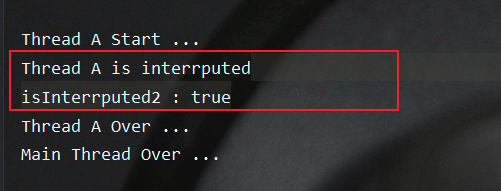
public static void test1() throws Exception{
Thread threadA = new Thread( () ->{
System.out.println("Thread A Start ...");
while (true) {
boolean isInterrputed1 = Thread.currentThread().isInterrupted();
if( isInterrputed1 == true ) {
boolean isInterrputed2 = Thread.currentThread().isInterrupted();
System.out.println("Thread A is interrputed");
System.out.println("isInterrputed2 : " + isInterrputed2);
break;
}
}
System.out.println("Thread A Over ...");
} );
threadA.start();
Thread.sleep(500);
threadA.interrupt();
threadA.join();
System.out.println("Main Thread Over ...");
}
|
从测试结果我们可以看到,当主线程向Runnable状态的A线程发出中断信号后,A线程的中断标志即被置位,利用此即可实现通过中断机制来达到停止线程的目的。另一方面,从isInterrputed2的输出结果为true,我们也可以确认 isInterrupted() 方法可以返回线程的中断标志
interrupted方法
这里我们再次尝试通过 interrupted() 方法来演示如果利用中断机制停止线程,实例如下
1
2
3
4
5
6
7
8
9
10
11
12
13
14
15
16
17
18
19
20
21
22
23
24
25
26
27
|
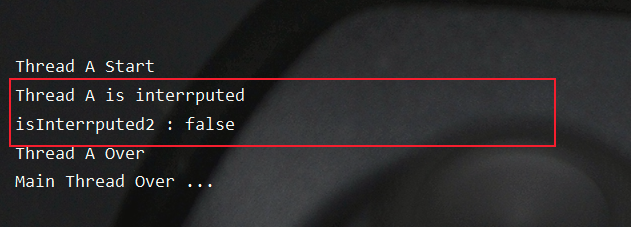
public static void test2() throws Exception{
Thread threadA = new Thread( () ->{
System.out.println("Thread A Start ...");
while (true) {
boolean isInterrputed1 = Thread.interrupted();
if( isInterrputed1 == true ) {
boolean isInterrputed2 = Thread.interrupted();
System.out.println("Thread A is interrputed");
System.out.println("isInterrputed2 : " + isInterrputed2);
break;
}
}
System.out.println("Thread A Over ...");
} );
threadA.start();
threadA.interrupt();
threadA.join();
System.out.println("Main Thread Over ...");
}
|
从测试结果我们可以看到,当主线程向Runnable状态的A线程发出中断信号后,A线程的中断标志即被置位,利用此即可实现通过中断机制来达到停止线程的目的。另一方面,从isInterrputed2的输出结果为false,我们也可以确认 isInterrupted() 方法不仅可以返回线程的中断标志,还会将其清除置为false,以供触发下一次中断事件
停止Waiting、Timed_Waiting状态的线程
通过上面实例,我们知道了如何停止一个Runnable状态的线程(通过读取中断标志位实现线程停止逻辑),其实对于Waiting、Timed_Waiting状态的线程,亦可以中断机制实现停止,当一个Waiting、Timed_Waiting状态的线程被中断时,其会抛出一个 InterruptedException 异常,故我们可通过捕获该异常实现线程停止。实例如下
1
2
3
4
5
6
7
8
9
10
11
12
13
14
15
16
17
18
19
20
21
22
23
24
25
26
27
28
29
30
31
32
|
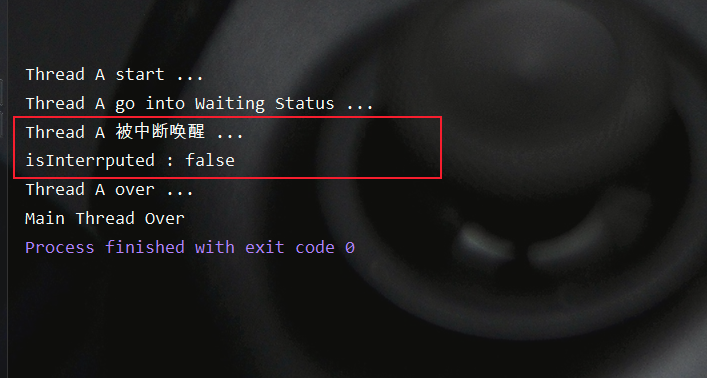
public static void test3() throws InterruptedException {
Object o = new Object();
Thread threadA = new Thread( ()->{
synchronized (o) {
System.out.println("Thread A start ...");
try {
System.out.println("Thread A go into Waiting Status ...");
o.wait();
}catch (InterruptedException e) {
Boolean isInterrputed = Thread.currentThread().isInterrupted();
System.out.println("Thread A 被中断唤醒 ...");
System.out.println("isInterrputed : " + isInterrputed);
}
System.out.println("Thread A over ...");
}
});
threadA.start();
Thread.sleep(5000);
threadA.interrupt();
threadA.join();
System.out.printf("Main Thread Over");
}
|
从测试结果我们可以看到,当主线程向Waiting状态的线程A发出中断信号后,线程A即会被唤醒并抛出 InterruptedException 异常,这里我们通过捕获该异常实现了该线程的停止。当然已经有 InterruptedException 异常用于提示该线程被中断了,故中断标志会被清除
Note :
需要注意的是,当一个处于Blocked状态的线程被中断后,其并不会抛出 InterruptedException 异常,原因很简单,因为其无法进入Runnable状态来抛出异常。所以,对于Waiting、Timed_Waiting状态的线程而言,其在被中断唤醒后可以抛出异常是有一定的前提条件的,即当其被中断唤醒后,是可以进入Runnable状态的。如果由于锁的原因导致其被阻塞而无法进入到Runnable状态的话,其将无法抛出异常,自然也就无法停止
参考文献
- Java并发编程之美 翟陆续、薛宾田著
