这里介绍在Spring中如何使用多例Bean,及解决注入多例Bean属性后无法更改的问题

楔子
通常在使用Spring时Bean都是单例的,但有时候我们也会有需要使用多例的场景。为此Spring提供了Prototype原型Bean。其会在每次注入或者通过Spring应用上下文获取的时候,都会创建一个新的Bean实例
众所周知,在Spring中使用@Component、@Service等注解创建的Bean默认都是单例的。如果想使用多例也很简单,只需使用@Scope注解,并将value属性设置为prototype即可
下面我们分别提供一个单例Bean、原型Bean示例
1
2
3
4
5
6
7
8
9
10
| package com.aaronzhu.SpringBoot1.PrototypeTest.pojo;
import org.springframework.stereotype.Component;
@Component
public class BlackDog {
private String name;
private Integer age;
}
|
1
2
3
4
5
6
7
8
9
10
11
12
13
14
| package com.aaronzhu.SpringBoot1.PrototypeTest.pojo;
import org.springframework.beans.factory.config.ConfigurableBeanFactory;
import org.springframework.context.annotation.Scope;
import org.springframework.stereotype.Component;
import java.util.Date;
@Component
@Scope( ConfigurableBeanFactory.SCOPE_PROTOTYPE )
public class BlackMan {
private String name;
private Date birthday;
}
|
现在分别提供两个Service来验证下效果
1
2
3
4
5
6
7
8
9
10
11
12
13
14
15
16
17
18
19
20
21
22
| package com.aaronzhu.SpringBoot1.PrototypeTest.service;
import com.aaronzhu.SpringBoot1.PrototypeTest.pojo.BlackDog;
import com.aaronzhu.SpringBoot1.PrototypeTest.pojo.BlackMan;
import org.springframework.beans.factory.annotation.Autowired;
import org.springframework.stereotype.Service;
@Service
public class AService {
@Autowired
private BlackDog blackDog;
@Autowired
private BlackMan blackMan;
public void test() {
for (int i=0; i<3; i++) {
System.out.printf("[Dog Say]: %d -->> %s%n", i, blackDog);
System.out.printf("[Man Say]: %d -->> %s%n", i, blackMan);
}
}
}
|
1
2
3
4
5
6
7
8
9
10
11
12
13
14
15
16
17
18
19
20
21
22
| package com.aaronzhu.SpringBoot1.PrototypeTest.service;
import com.aaronzhu.SpringBoot1.PrototypeTest.pojo.BlackDog;
import com.aaronzhu.SpringBoot1.PrototypeTest.pojo.BlackMan;
import org.springframework.beans.factory.annotation.Autowired;
import org.springframework.stereotype.Service;
@Service
public class BService {
@Autowired
private BlackDog blackDog;
@Autowired
private BlackMan blackMan;
public void test() {
for (int i=0; i<3; i++) {
System.out.printf("[Dog Say]: %d -->> %s%n", i, blackDog);
System.out.printf("[Man Say]: %d -->> %s%n", i, blackMan);
}
}
}
|
测试用例如下
1
2
3
4
5
6
7
8
9
10
11
12
13
14
15
16
17
18
19
20
21
22
23
24
| package com.aaronzhu.SpringBoot1.service;
import com.aaronzhu.SpringBoot1.PrototypeTest.service.*;
import org.junit.jupiter.api.Test;
import org.springframework.beans.factory.annotation.Autowired;
import org.springframework.boot.test.context.SpringBootTest;
@SpringBootTest
public class PrototypeTest {
@Autowired
private AService aService;
@Autowired
private BService bService;
@Test
public void test1() {
System.out.printf("--------------------------------------- %s -------------------%n", "Test A Service");
aService.test();
System.out.printf("--------------------------------------- %s -------------------%n", "Test B Service");
bService.test();
}
}
|
测试结果如下所示
- 对于单例Bean而言,不仅在同一个Service实例中使用的都是同一个实例对象;而且在不同的Service实例中注入的也是同一个实例对象。符合预期
- 对于多例Bean而言,其只能保证在不同的Service实例中注入不同的实例对象;但在同一个Service实例中,每次使用的是却是同一个实例对象

解决方案
问题来了,不是说Prototype原型Bean每次都会使用一个新的实例对象么?为什么在同一个Service实例中,每次使用的是却是同一个实例对象呢?原因在于Spring的多例是指在每次注入或者通过Spring应用上下文获取的时候,都会创建一个新的Bean实例。显然对于某一个Service实例而言,在注入多例Bean的属性时,Spring会创建一个全新的多例Bean进行注入。但一旦完成属性注入后,该Service实例其所使用的多例Bean即会被固定住,后续将不会再发生更改。那有没有办法实现,即使在同一个Service实例当中,每次使用的多例Bean都是不同的对象呢?答案自然是有的
@Scope注解的proxyMode属性
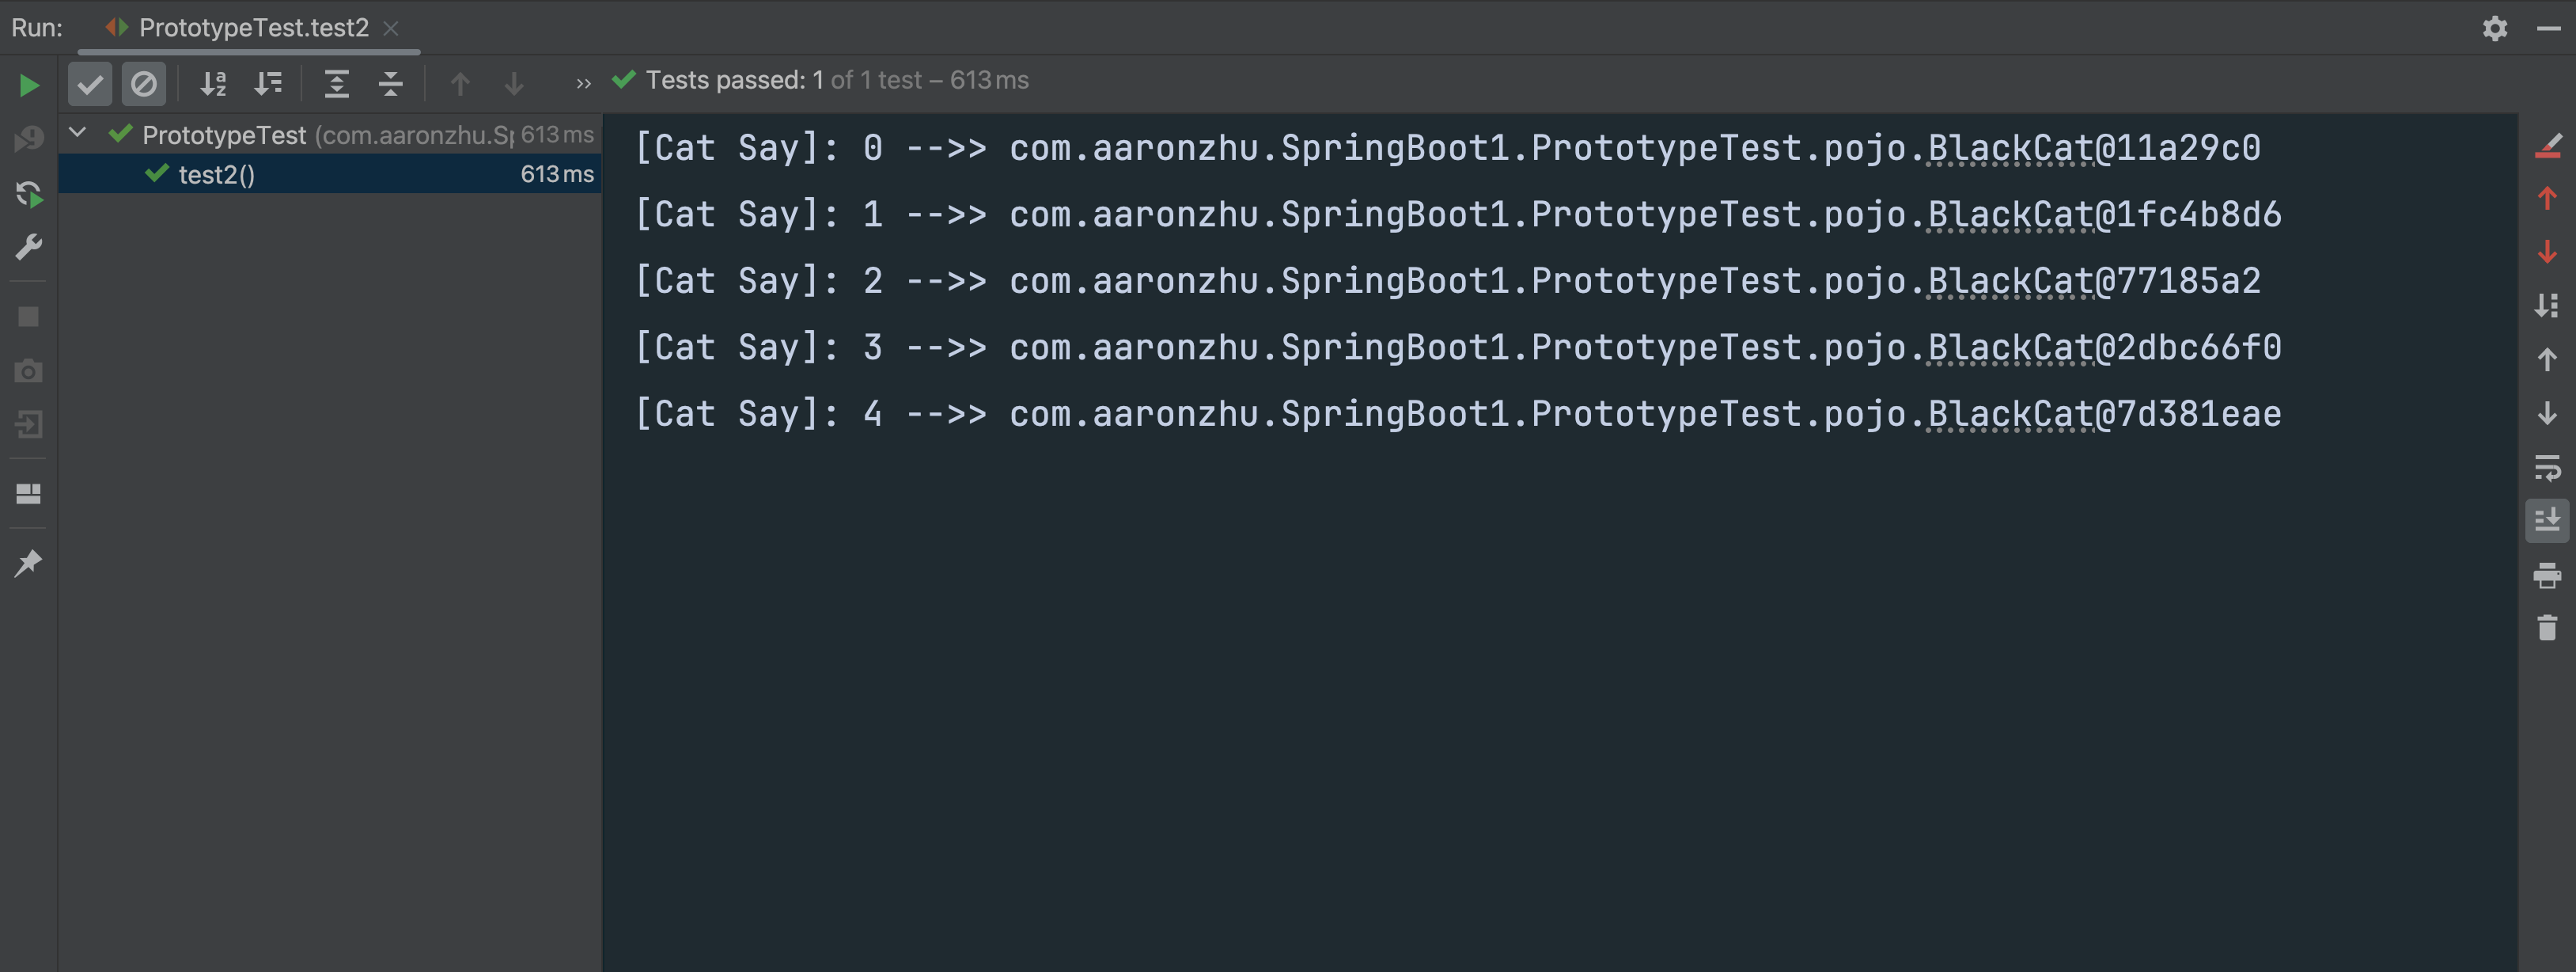
最简单的办法就是通过代理对象,设置@Scope注解的proxyMode属性为 ScopedProxyMode.TARGET_CLASS 即可。下述是一个设置proxyMode属性的多例Bean示例
1
2
3
4
5
6
7
8
9
10
11
12
13
14
15
16
| package com.aaronzhu.SpringBoot1.PrototypeTest.pojo;
import org.springframework.beans.factory.config.ConfigurableBeanFactory;
import org.springframework.context.annotation.Scope;
import org.springframework.context.annotation.ScopedProxyMode;
import org.springframework.stereotype.Component;
import java.util.Date;
@Component
@Scope(value= ConfigurableBeanFactory.SCOPE_PROTOTYPE, proxyMode = ScopedProxyMode.TARGET_CLASS)
public class BlackCat {
private String name;
private Date birthday;
}
|
然后在Service中注入该多例Bean
1
2
3
4
5
6
7
8
9
10
11
12
13
14
15
16
17
| package com.aaronzhu.SpringBoot1.PrototypeTest.service;
import com.aaronzhu.SpringBoot1.PrototypeTest.pojo.BlackCat;
import org.springframework.beans.factory.annotation.Autowired;
import org.springframework.stereotype.Service;
@Service
public class CService {
@Autowired
private BlackCat blackCat;
public void test() {
for (int i=0; i<5; i++) {
System.out.printf("[Cat Say]: %d -->> %s%n", i, blackCat);
}
}
}
|
测试用例如下所示
1
2
3
4
5
6
7
8
9
10
11
12
13
14
15
16
17
18
19
| package com.aaronzhu.SpringBoot1.service;
import com.aaronzhu.SpringBoot1.PrototypeTest.service.*;
import org.junit.jupiter.api.Test;
import org.springframework.beans.factory.annotation.Autowired;
import org.springframework.boot.test.context.SpringBootTest;
@SpringBootTest
public class PrototypeTest {
@Autowired
private CService cService;
@Test
public void test2() {
cService.test();
}
}
|
测试结果如下所示,符合预期
@Lookup注解
我们可以将@Lookup注解在一个非静态的方法上,这样每次调用这个方法时Spring会动态地查找、注入相应的Bean实例。当我们不设置@Lookup注解的value属性时,其会根据方法签名中的返回类型去返回相应类型的Bean实例。与此同时,由于该方法的方法体并不会被真正执行,故我们直接return null,也不会影响结果获取。我们先定义一个多例Bean示例
1
2
3
4
5
6
7
8
9
10
11
12
13
| package com.aaronzhu.SpringBoot1.PrototypeTest.pojo;
import org.springframework.beans.factory.config.ConfigurableBeanFactory;
import org.springframework.context.annotation.Scope;
import org.springframework.stereotype.Component;
@Component
@Scope(value= ConfigurableBeanFactory.SCOPE_PROTOTYPE)
public class BlackPig {
private String name;
private String sex;
}
|
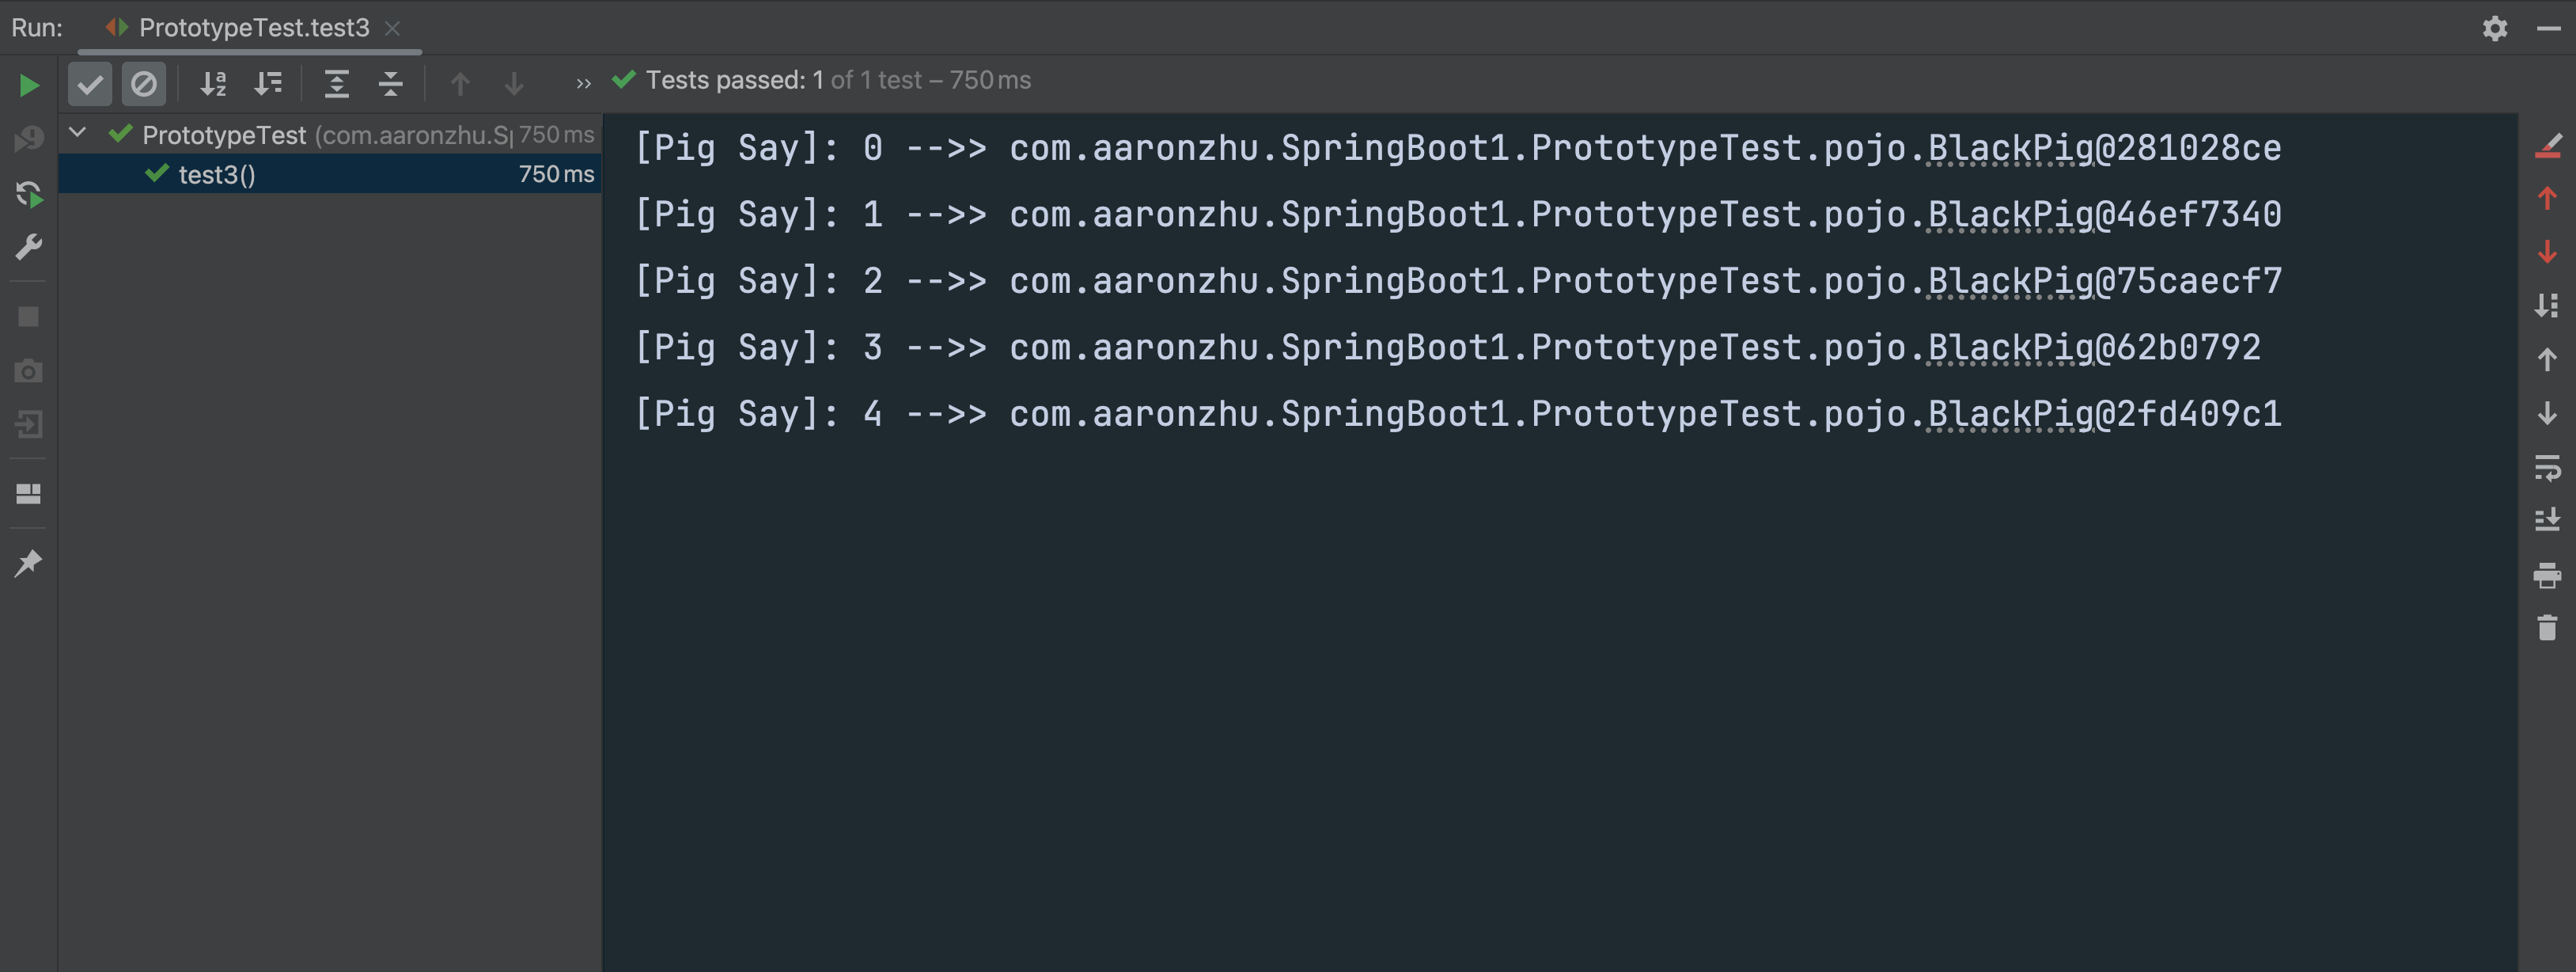
然后,在Service中定义一个添加了@Lookup注解的方法。由于其的返回类型是一个多例Bean。故每次调用该方法,都可以获取到不同的Bean实例
1
2
3
4
5
6
7
8
9
10
11
12
13
14
15
16
17
18
19
20
21
22
| package com.aaronzhu.SpringBoot1.PrototypeTest.service;
import com.aaronzhu.SpringBoot1.PrototypeTest.pojo.BlackPig;
import org.springframework.beans.factory.annotation.Lookup;
import org.springframework.stereotype.Service;
@Service
public class DService {
@Lookup
public BlackPig getPig() {
return null;
}
public void test() {
for (int i=0; i<5; i++) {
BlackPig blackPig = getPig();
System.out.printf("[Pig Say]: %d -->> %s%n", i, blackPig);
}
}
}
|
测试用例如下
1
2
3
4
5
6
7
8
9
10
11
12
13
14
15
16
17
18
19
| package com.aaronzhu.SpringBoot1.service;
import com.aaronzhu.SpringBoot1.PrototypeTest.service.*;
import org.junit.jupiter.api.Test;
import org.springframework.beans.factory.annotation.Autowired;
import org.springframework.boot.test.context.SpringBootTest;
@SpringBootTest
public class PrototypeTest {
@Autowired
private DService dService;
@Test
public void test3() {
dService.test();
}
}
|
测试结果如下,符合预期
ApplicationContext 应用上下文
由于Spring的Prototype原型Bean保证了每次通过 ApplicationContext 应用上下文 获取实例对象时都是不同的,故我们也可以直接通过 ApplicationContext 应用上下文来获取实例对象。首先,我们需要先实现ApplicationContextAware接口的setApplicationContext方法来获取到 ApplicationContext 应用上下文
1
2
3
4
5
6
7
8
9
10
11
12
13
14
15
16
17
18
19
20
21
| package com.aaronzhu.SpringBoot1.util;
import org.springframework.beans.BeansException;
import org.springframework.context.ApplicationContext;
import org.springframework.context.ApplicationContextAware;
import org.springframework.stereotype.Component;
@Component
public class ApplicationContextUtil implements ApplicationContextAware {
private static ApplicationContext context = null;
@Override
public void setApplicationContext(ApplicationContext applicationContext) throws BeansException {
context = applicationContext;
}
public static <T> T getBean(Class<T> clazz) {
return context.getBean(clazz);
}
}
|
然后,提供一个多例Bean的定义
1
2
3
4
5
6
7
8
9
10
11
12
13
14
| package com.aaronzhu.SpringBoot1.PrototypeTest.pojo;
import org.springframework.beans.factory.config.ConfigurableBeanFactory;
import org.springframework.context.annotation.Scope;
import org.springframework.stereotype.Component;
@Component
@Scope(value= ConfigurableBeanFactory.SCOPE_PROTOTYPE)
public class BlackTiger {
private String name;
private String sex;
}
|
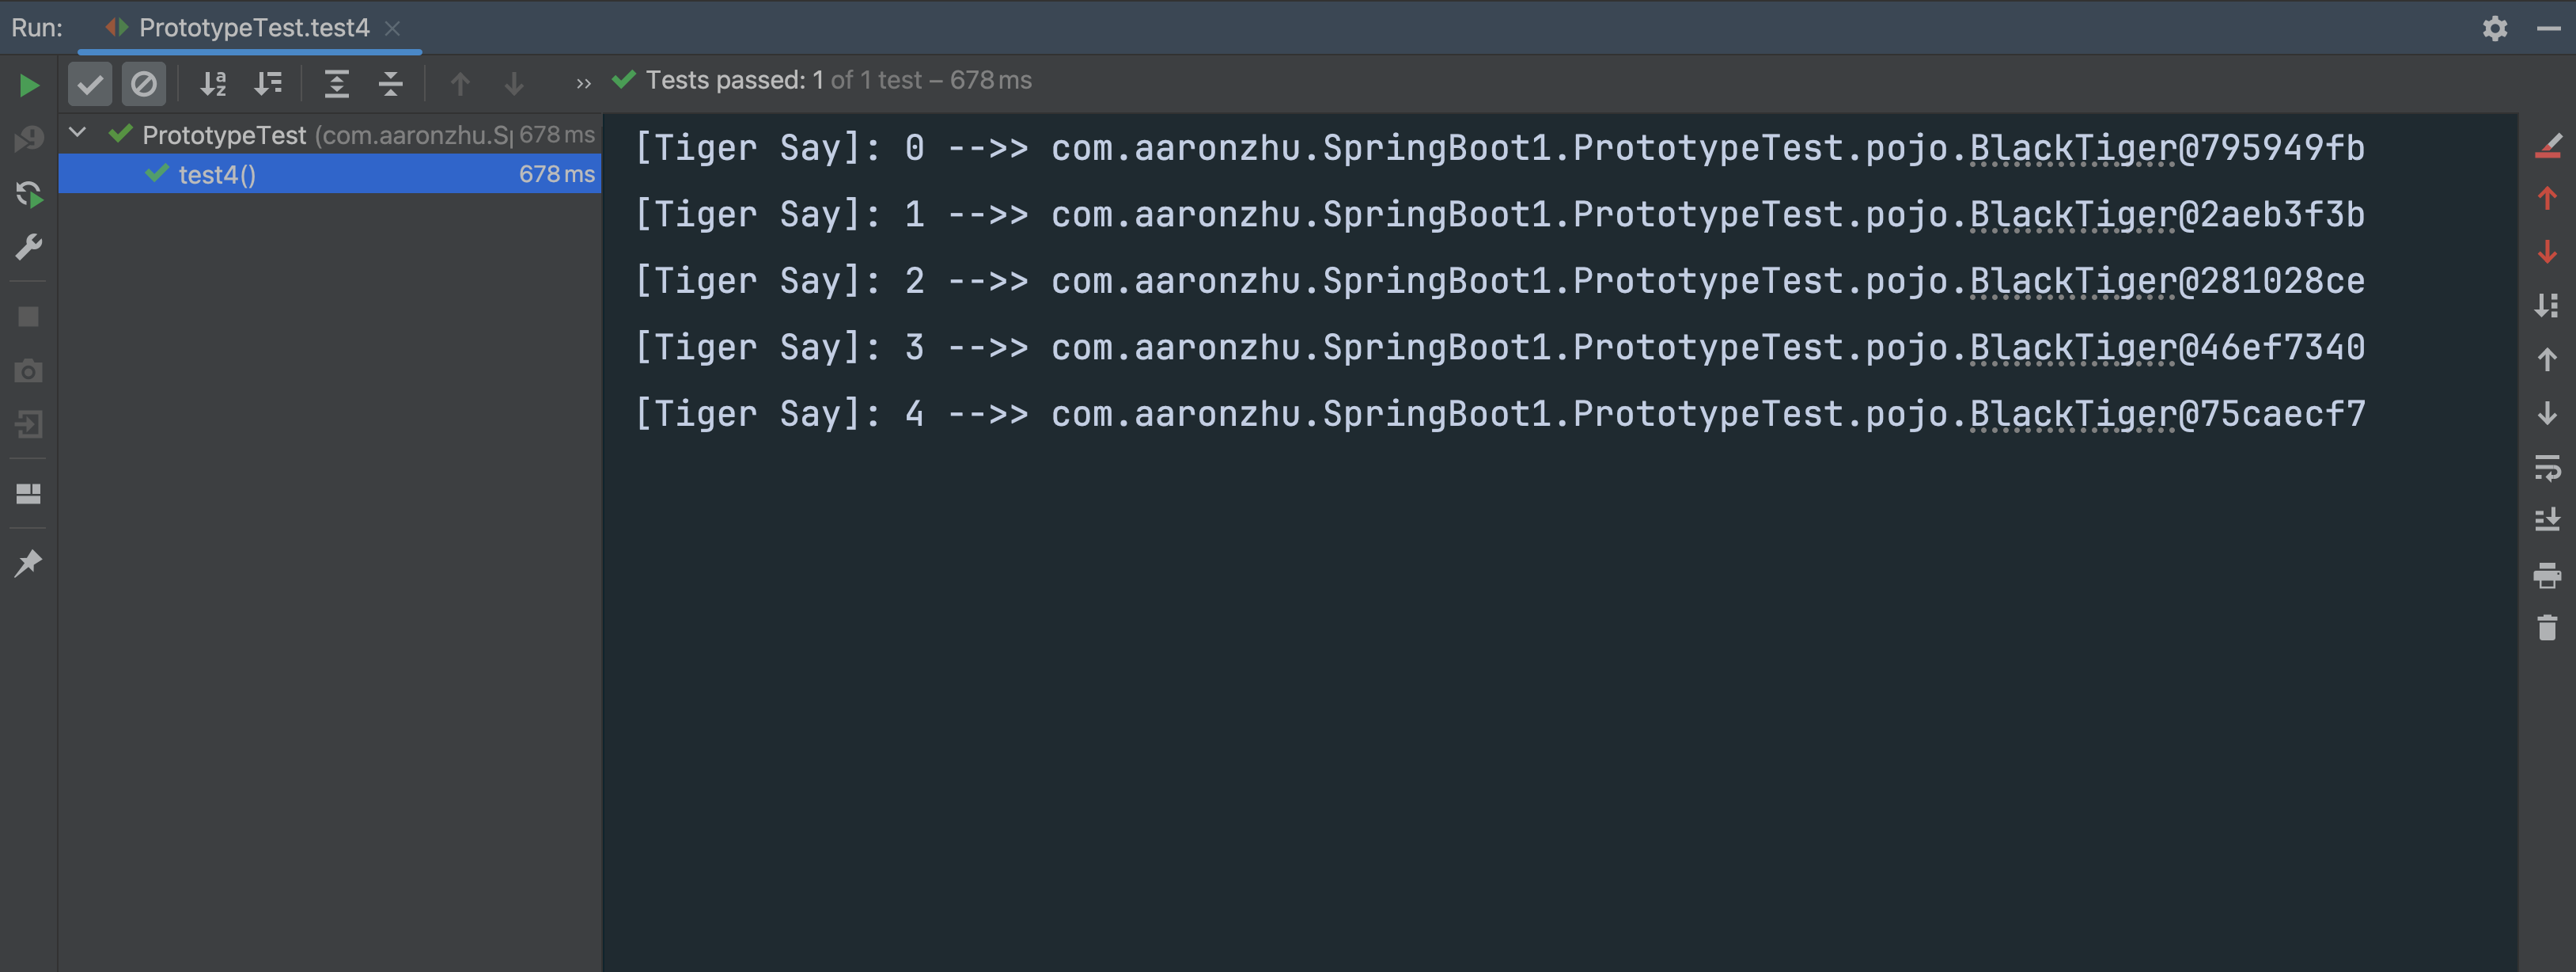
现在,我们就可以在Service当中通过ApplicationContext应用上下文获取Bean了
1
2
3
4
5
6
7
8
9
10
11
12
13
14
15
16
17
| package com.aaronzhu.SpringBoot1.PrototypeTest.service;
import com.aaronzhu.SpringBoot1.PrototypeTest.pojo.BlackTiger;
import com.aaronzhu.SpringBoot1.util.ApplicationContextUtil;
import org.springframework.stereotype.Service;
@Service
public class EService {
public void test() {
for (int i=0; i<5; i++) {
BlackTiger blackTiger = ApplicationContextUtil.getBean(BlackTiger.class);
System.out.printf("[Tiger Say]: %d -->> %s%n", i, blackTiger);
}
}
}
|
测试用例如下
1
2
3
4
5
6
7
8
9
10
11
12
13
14
15
16
17
18
19
| package com.aaronzhu.SpringBoot1.service;
import com.aaronzhu.SpringBoot1.PrototypeTest.service.*;
import org.junit.jupiter.api.Test;
import org.springframework.beans.factory.annotation.Autowired;
import org.springframework.boot.test.context.SpringBootTest;
@SpringBootTest
public class PrototypeTest {
@Autowired
private EService eService;
@Test
public void test4() {
eService.test();
}
}
|
测试结果符合预期