这里介绍分布式定时任务xxl-job的实践

配置/开发
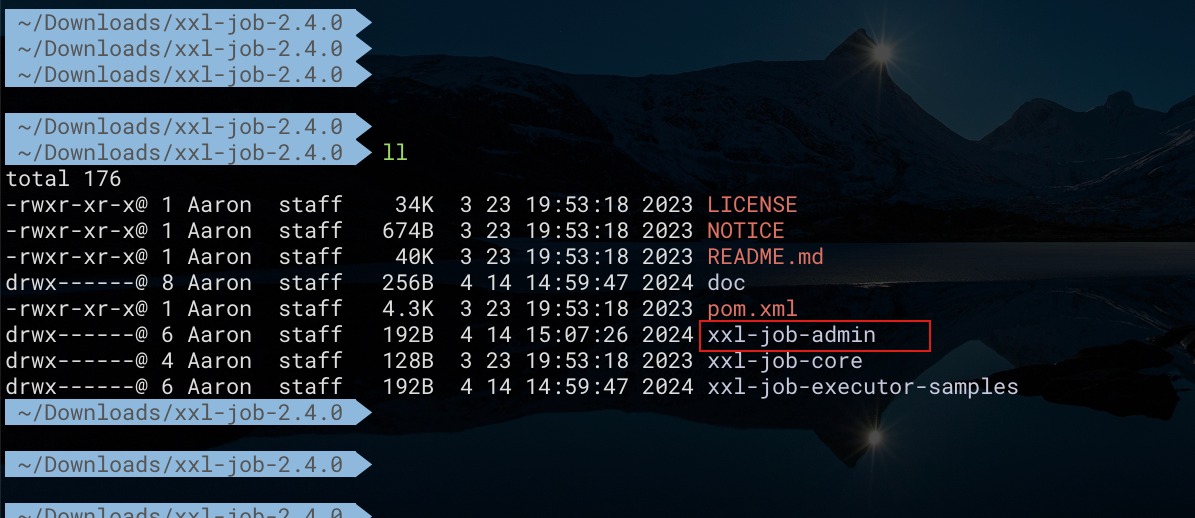
从github中通过下述地址下载、解压源码,这里我们使用2.4.0版本
1
| https://github.com/xuxueli/xxl-job/archive/refs/tags/2.4.0.zip
|
调度中心
解压后,通过 xxl-job-2.4.0/doc/db 获取调度中心的sql脚本——tables_xxl_job.sql,执行该脚本,完成调度中心的建库建表语句。其中各表的作用如下:
- xxl_job_group:执行器信息表。维护任务执行器信息
- xxl_job_info:调度扩展信息表。用于保存xxl-job调度任务的扩展信息,如任务分组、任务名、机器地址、执行器、执行入参和报警邮件等等
- xxl_job_lock:任务调度锁表
- xxl_job_log:调度日志表。用于保存xxl-job调度任务的历史信息,如调度结果、执行结果、调度入参、调度机器和执行器等等
- xxl_job_log_report:调度日志报表。用户存储xxl-job任务调度日志的报表,调度中心报表功能页面会用到
- xxl_job_logglue:任务GLUE日志。用于保存GLUE更新历史,用于支持GLUE的版本回溯功能
- xxl_job_registry:执行器注册表。维护在线的执行器和调度中心机器地址信息
- xxl_job_user:系统用户表
解压后,xxl-job-admin工程即为调度中心的工程,我们只需对其进行微调、修改即可
具体地,修改xxl-job-admin工程中application.properties配置文件中关于DB链接信息、服务端口等配置项
1
2
3
4
5
6
7
8
9
10
11
|
server.port=2222
server.servlet.context-path=/xxl-job-admin
spring.datasource.url=jdbc:mysql://localhost:3306/xxl_job?useSSL=false&allowPublicKeyRetrieval=true
spring.datasource.username=root
spring.datasource.password=529116
spring.datasource.driver-class-name=com.mysql.cj.jdbc.Driver
...
|
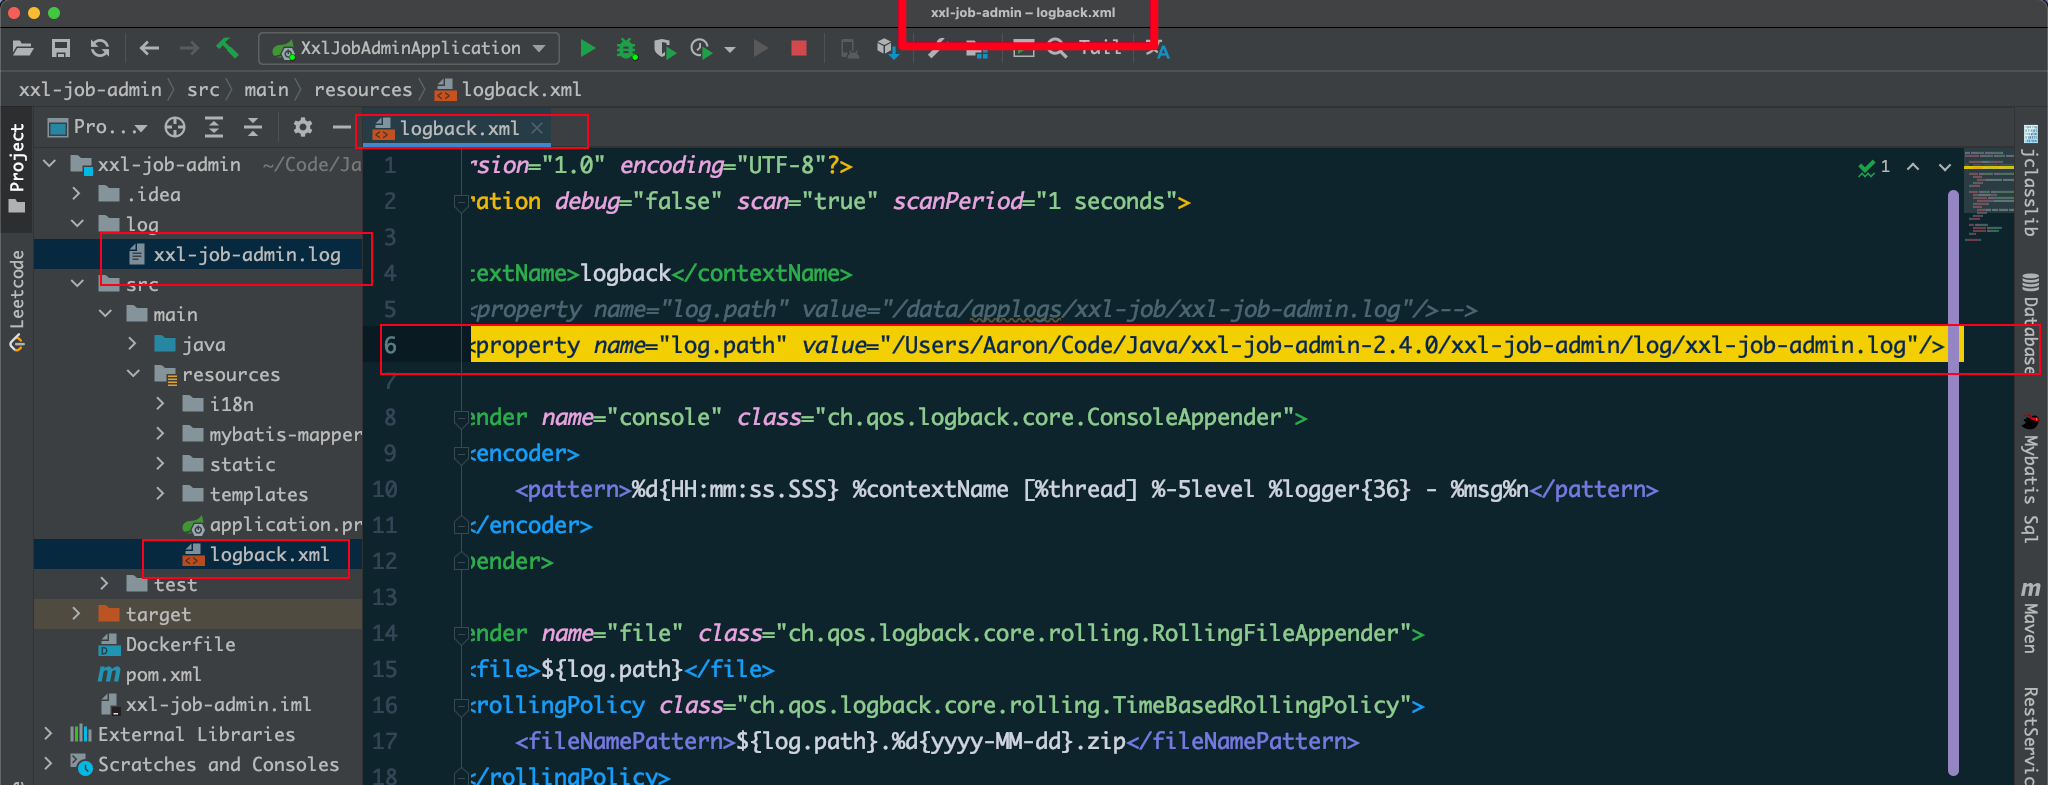
然后修改logback.xml日志配置文件中关于日志文件的路径信息(日志文件需提前手动创建完成)
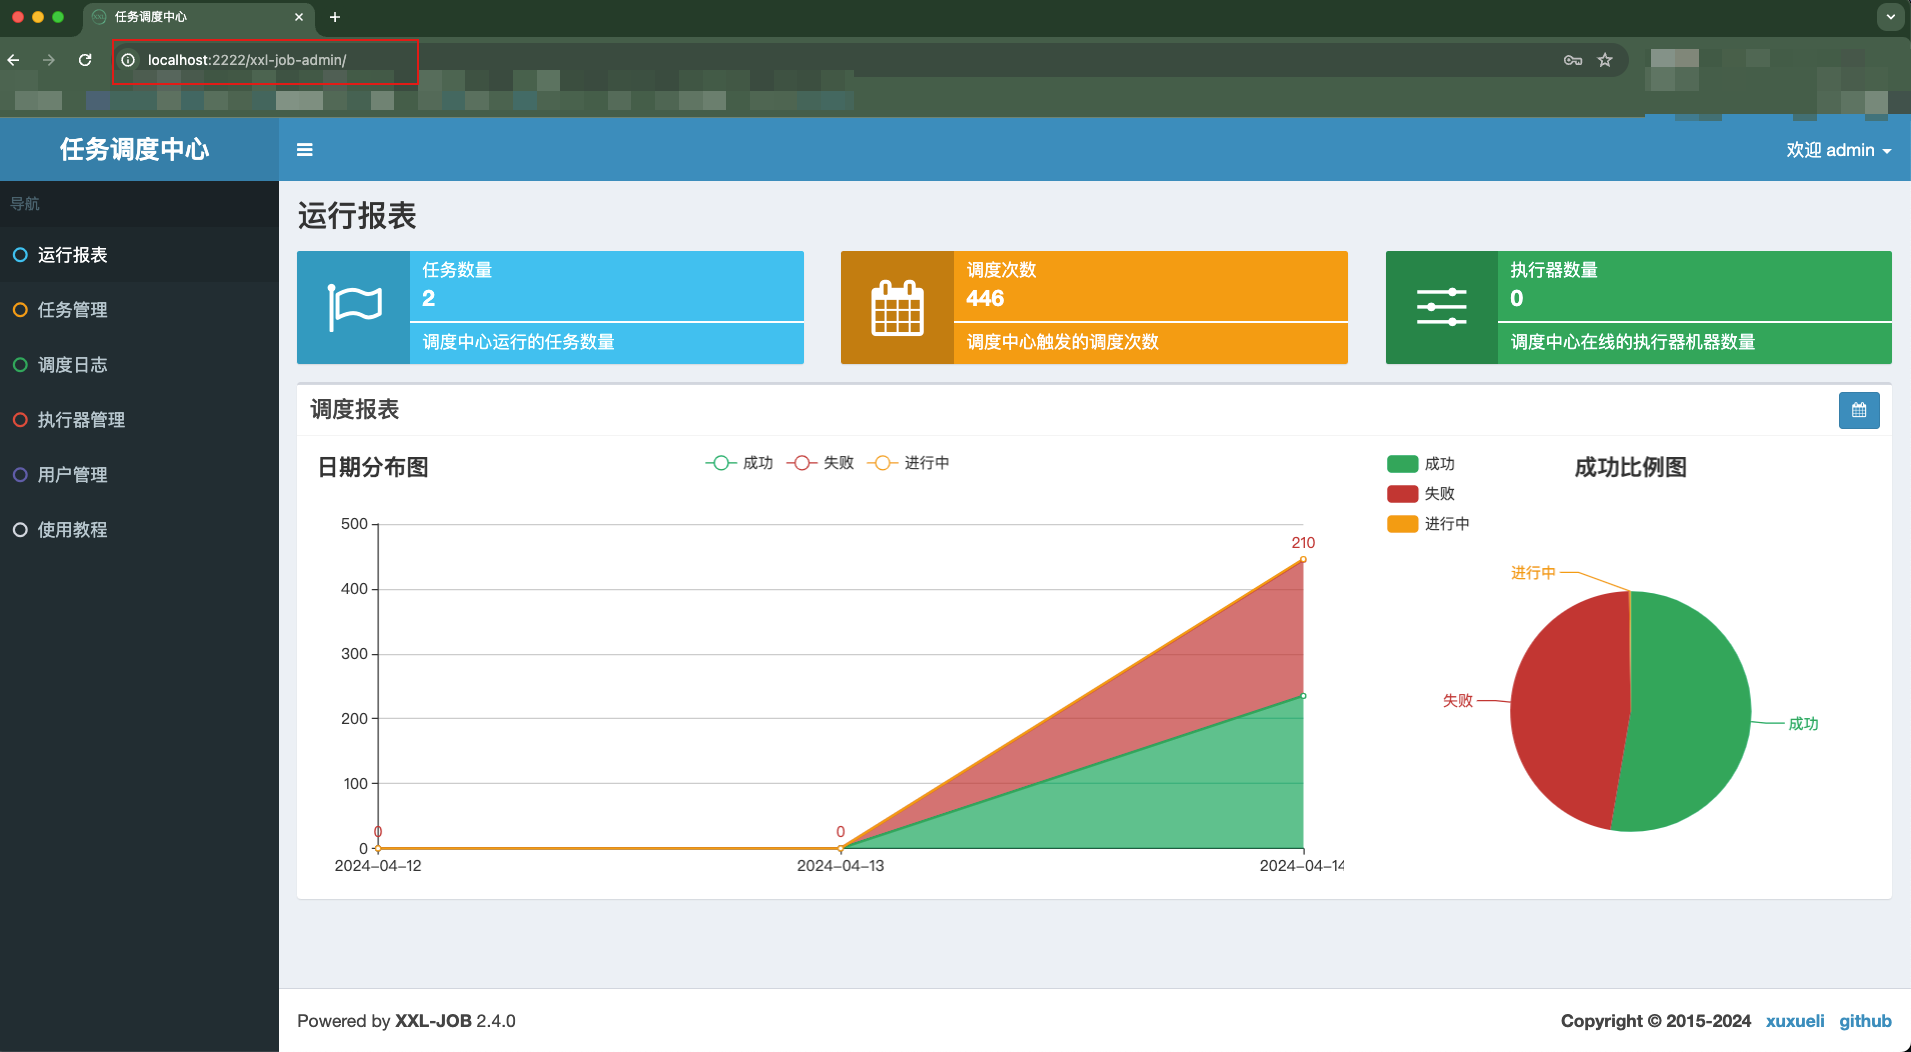
至此就可以启动调度中心了。可通过 http://localhost:2222/xxl-job-admin 来访问web页面。默认账户、密码为 admin、123456
执行器
在xxl-job中,任务调度 与 任务执行 是分开的。具体地,前者由调度中心负责;后者则由执行器完成。通常情况下,我们会将执行器集成到我们的业务项目工程当中。首先,在我们的业务项目中添加对xxl-job-core的依赖
1
2
3
4
5
6
|
<dependency>
<groupId>com.xuxueli</groupId>
<artifactId>xxl-job-core</artifactId>
<version>2.4.0</version>
</dependency>
|
由于我们的业务工程采用了SpringBoot框架,故我们将源码的示例工程 xxl-job-2.4.0/xxl-job-executor-samples/xxl-job-executor-sample-springboot的application.properties配置文件中相关配置项添加到我们的业务工程中
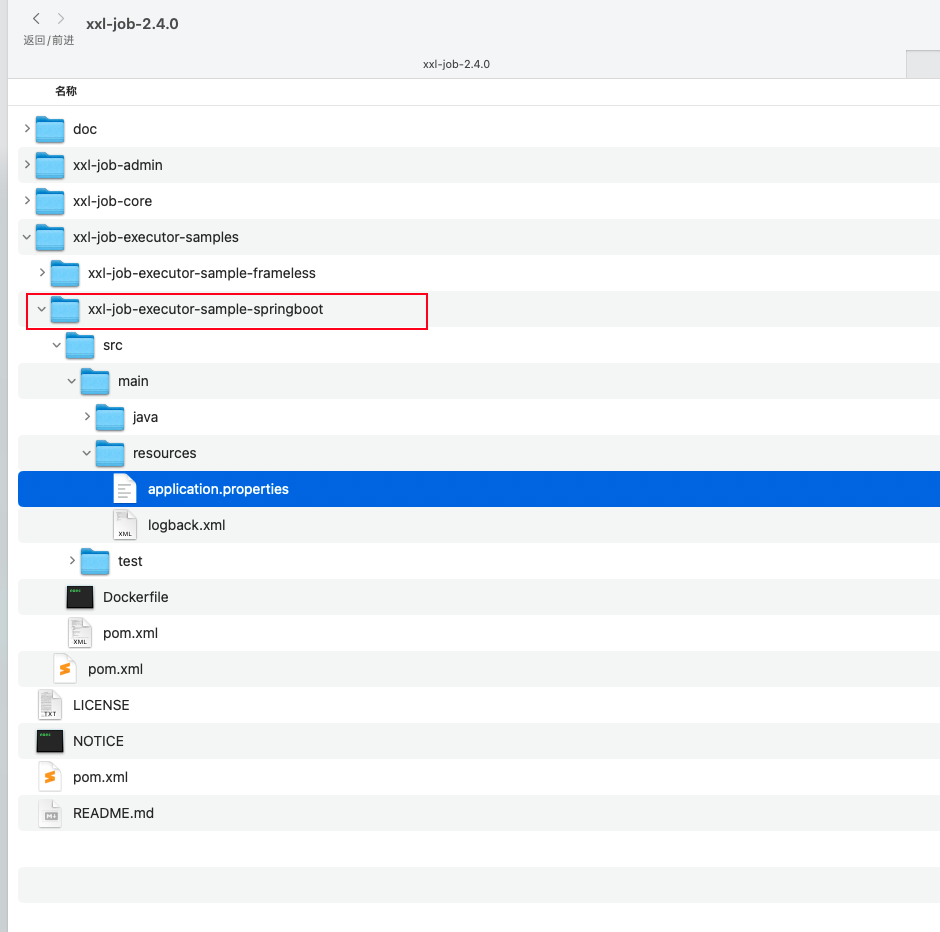
具体配置如下所示。其中,xxl.job.executor.logpath配置项所指定的是执行器执行日志的存储路径,可提前完成目录创建
1
2
3
4
5
6
7
8
9
10
11
12
13
14
15
16
17
18
19
20
21
22
| server.port=3001
xxl.job.admin.addresses=http://127.0.0.1:2222/xxl-job-admin
xxl.job.accessToken=default_token
xxl.job.executor.appname=say-hello
xxl.job.executor.port=30001
xxl.job.executor.logpath=/Users/Aaron/Code/Java/SpringBoot1/log
xxl.job.executor.logretentiondays=30
...
|
同理,我们将源码的示例工程/xxl-job-2.4.0/xxl-job-executor-samples/xxl-job-executor-sample-springboot的/src/main/java/com/xxl/job/executor/core/config/XxlJobConfig.java配置类 添加到我们的业务工程当中。示例如下,注意移除配置文件中未指定配置项的属性。否则会由于@Value属性注入失败导致的服务启动失败
1
2
3
4
5
6
7
8
9
10
11
12
13
14
15
16
17
18
19
20
21
22
23
24
25
26
27
28
29
30
31
32
33
34
35
36
37
38
39
|
@Configuration
@Slf4j
public class XxlJobConfig {
@Value("${xxl.job.admin.addresses}")
private String adminAddresses;
@Value("${xxl.job.accessToken}")
private String accessToken;
@Value("${xxl.job.executor.appname}")
private String appname;
@Value("${xxl.job.executor.port}")
private int port;
@Value("${xxl.job.executor.logpath}")
private String logPath;
@Value("${xxl.job.executor.logretentiondays}")
private int logRetentionDays;
@Bean
public XxlJobSpringExecutor xxlJobExecutor() {
log.info(">>>>>>>>>>> xxl-job config init.");
XxlJobSpringExecutor xxlJobSpringExecutor = new XxlJobSpringExecutor();
xxlJobSpringExecutor.setAdminAddresses(adminAddresses);
xxlJobSpringExecutor.setAppname(appname);
xxlJobSpringExecutor.setPort(port);
xxlJobSpringExecutor.setAccessToken(accessToken);
xxlJobSpringExecutor.setLogPath(logPath);
xxlJobSpringExecutor.setLogRetentionDays(logRetentionDays);
return xxlJobSpringExecutor;
}
}
|
创建任务
基于方法的Bean模式任务示例
通过在任务方法添加 @XxlJob 注解实现任务定义。其中,value属性:与在调度中心任务的JobHandler属性值 保持一致;init属性:当任务启动时,需要执行的初始化方法;destroy属性:当 任务停止/执行器实例下线 时,需要执行的销毁方法
1
2
3
4
5
6
7
8
9
10
11
12
13
14
15
16
17
18
19
20
21
22
23
24
25
26
27
28
29
30
31
32
33
34
35
36
37
38
39
40
41
42
43
44
45
46
47
48
49
| package com.aaronzhu.SpringBoot1.xxljob;
import com.xxl.job.core.biz.model.ReturnT;
import com.xxl.job.core.context.XxlJobHelper;
import com.xxl.job.core.handler.annotation.XxlJob;
import lombok.extern.slf4j.Slf4j;
import org.springframework.beans.factory.annotation.Value;
import org.springframework.stereotype.Component;
import java.text.SimpleDateFormat;
import java.util.Arrays;
import java.util.Date;
@Component
@Slf4j
public class MyJob {
private static final SimpleDateFormat formatter = new SimpleDateFormat("yyyy-MM-dd HH:mm:ss");
@Value("${server.port}")
private Integer port;
@XxlJob(value = "hello-world", init = "start", destroy = "end")
public ReturnT<String> helloWorld() {
String param = XxlJobHelper.getJobParam();
String[] params = param.split(",");
String nowTime = formatter.format(new Date());
System.out.println(nowTime+"["+port+"] -->> "+"<ING>: Hello World. "+"params: "+Arrays.toString(params));
XxlJobHelper.log(nowTime+"["+port+"] -->> "+"Hello World Job Success Exec");
return ReturnT.SUCCESS;
}
private void start() {
System.out.println("["+port+"] -->> "+"<Init>: 任务初始化方法");
}
private void end() {
System.out.println("["+port+"] -->> "+"<End>: 任务销毁方法");
}
}
|
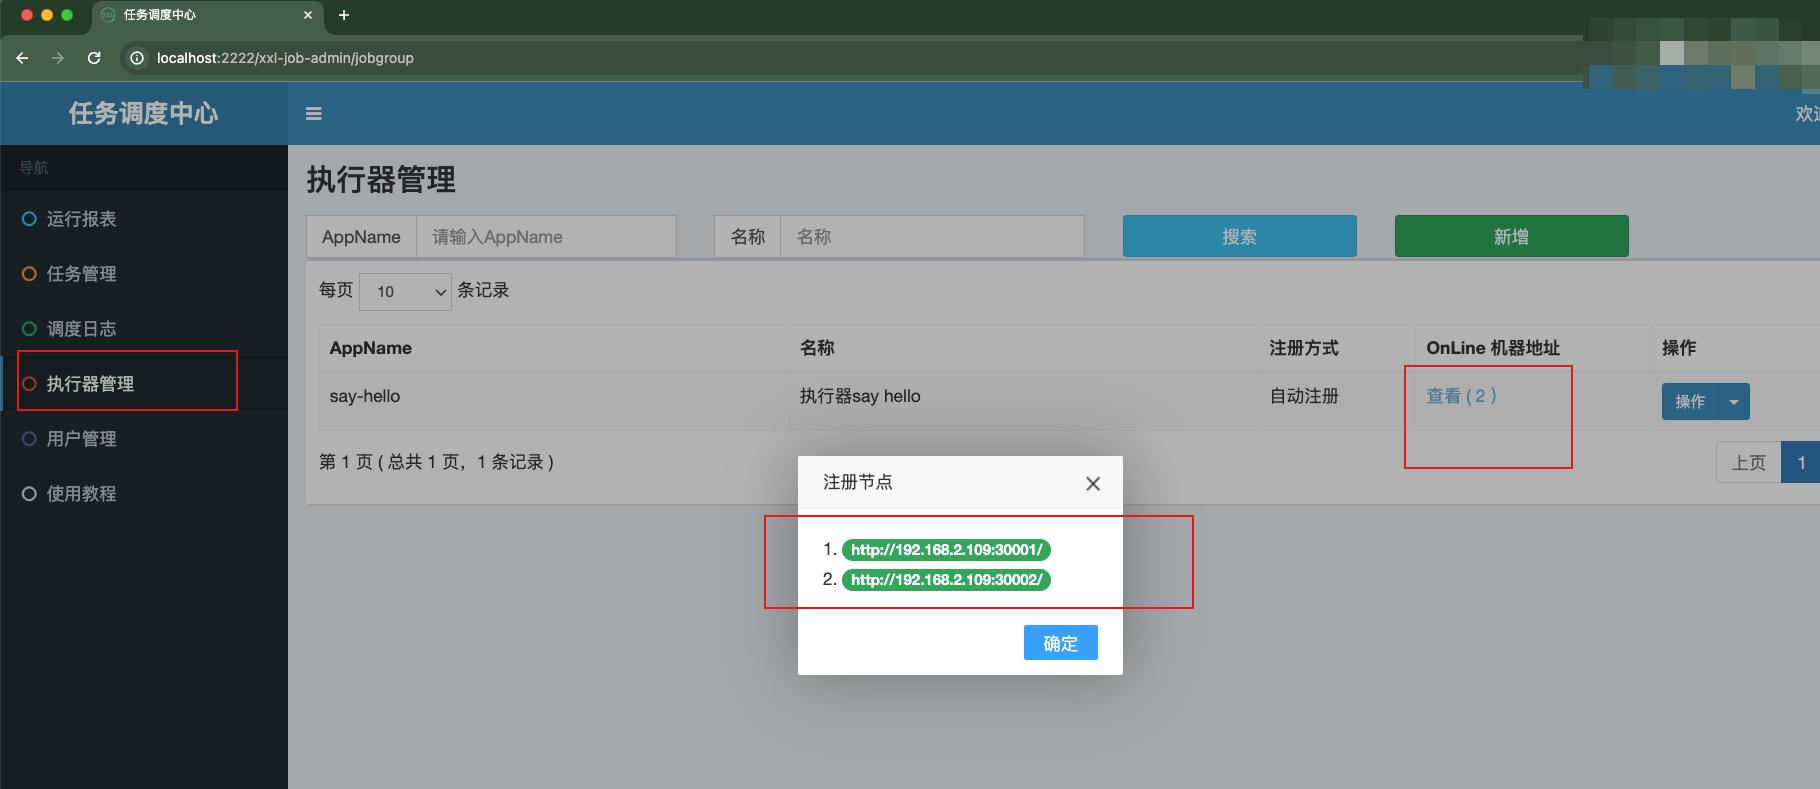
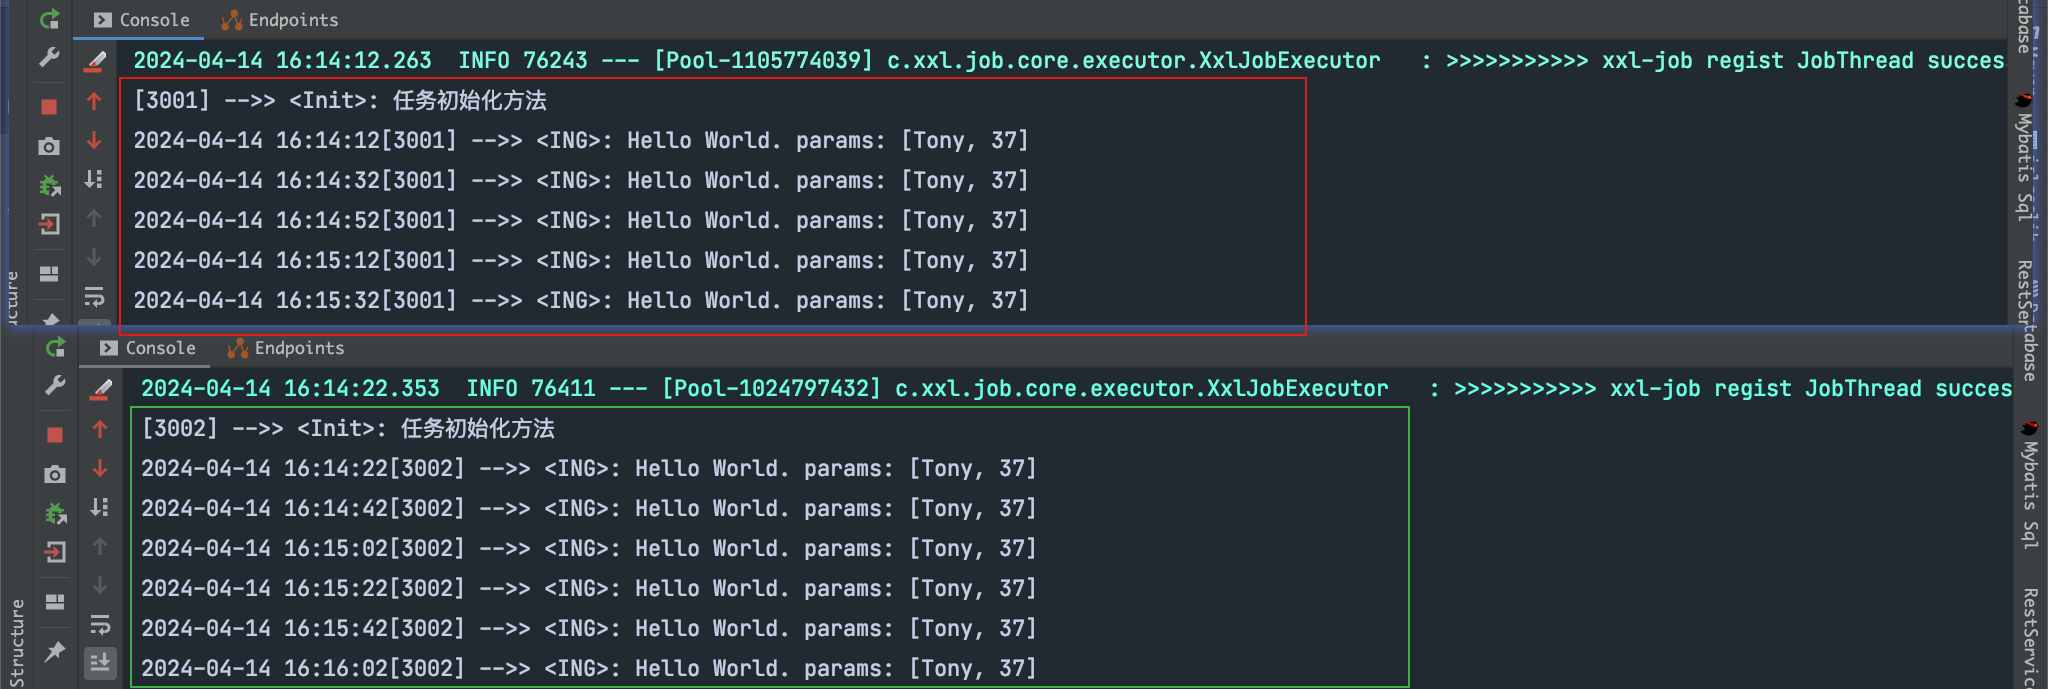
现在,我们来启动业务项目的2个实例
- 实例1:server.port、xxl.job.executor.port分别设置为 3001、30001
- 实例2:server.port、xxl.job.executor.port分别设置为 3002、30002
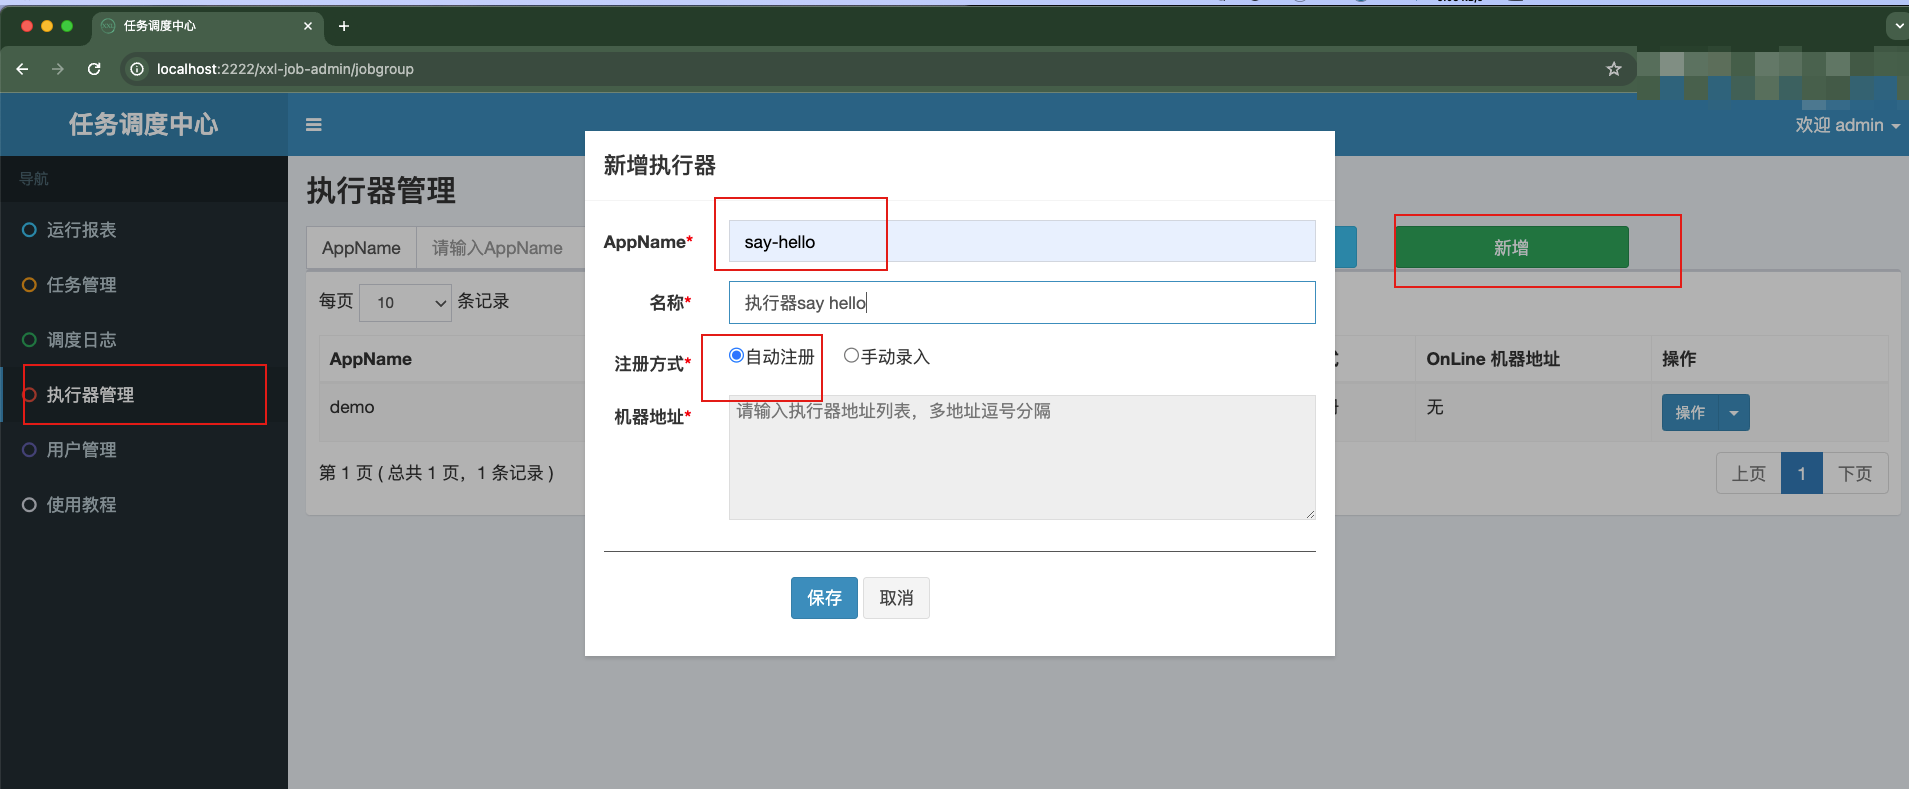
2个执行器实例启动完毕后,我们通过调度中心的web管理页面来添加执行器。其中,AppName必须与xxl.job.executor.appname配置项的值保持一致
等待一会,即可看到该执行器对应的实例信息了
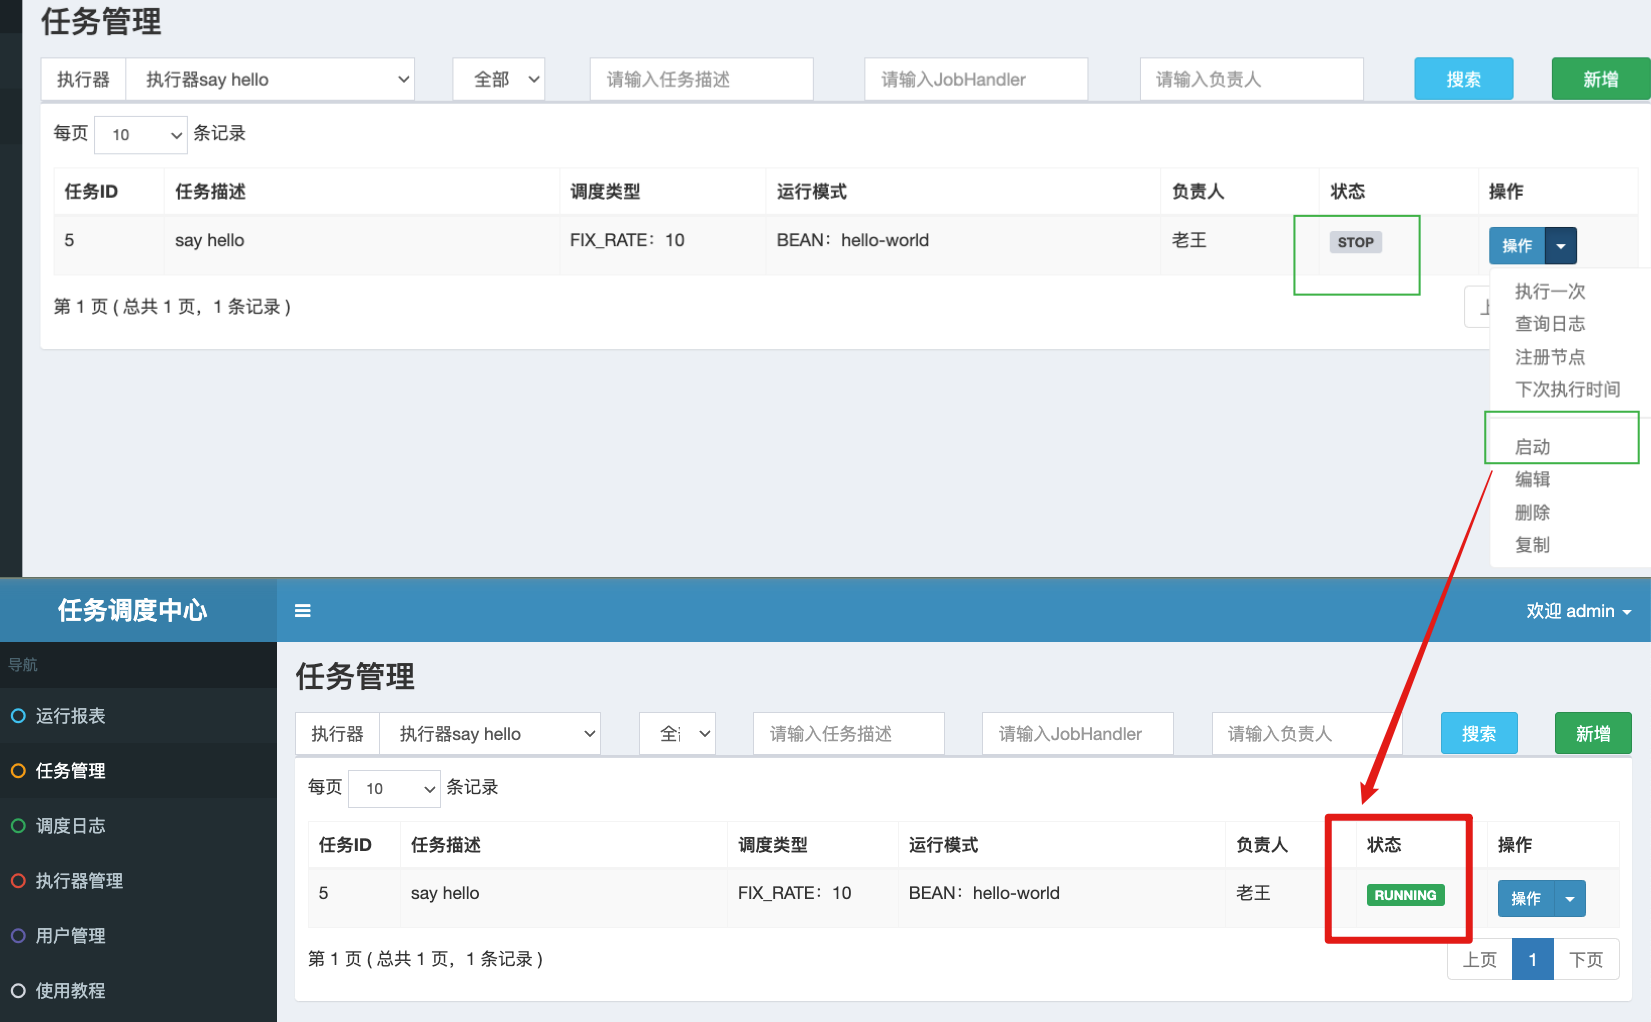
现在我们通过调度中心的web页面来添加任务。这里我们指定任务按轮询策略、每10秒执行调度一次。其中,JobHandler配置值即上文任务代码中@XxlJob注解所指定的value属性值
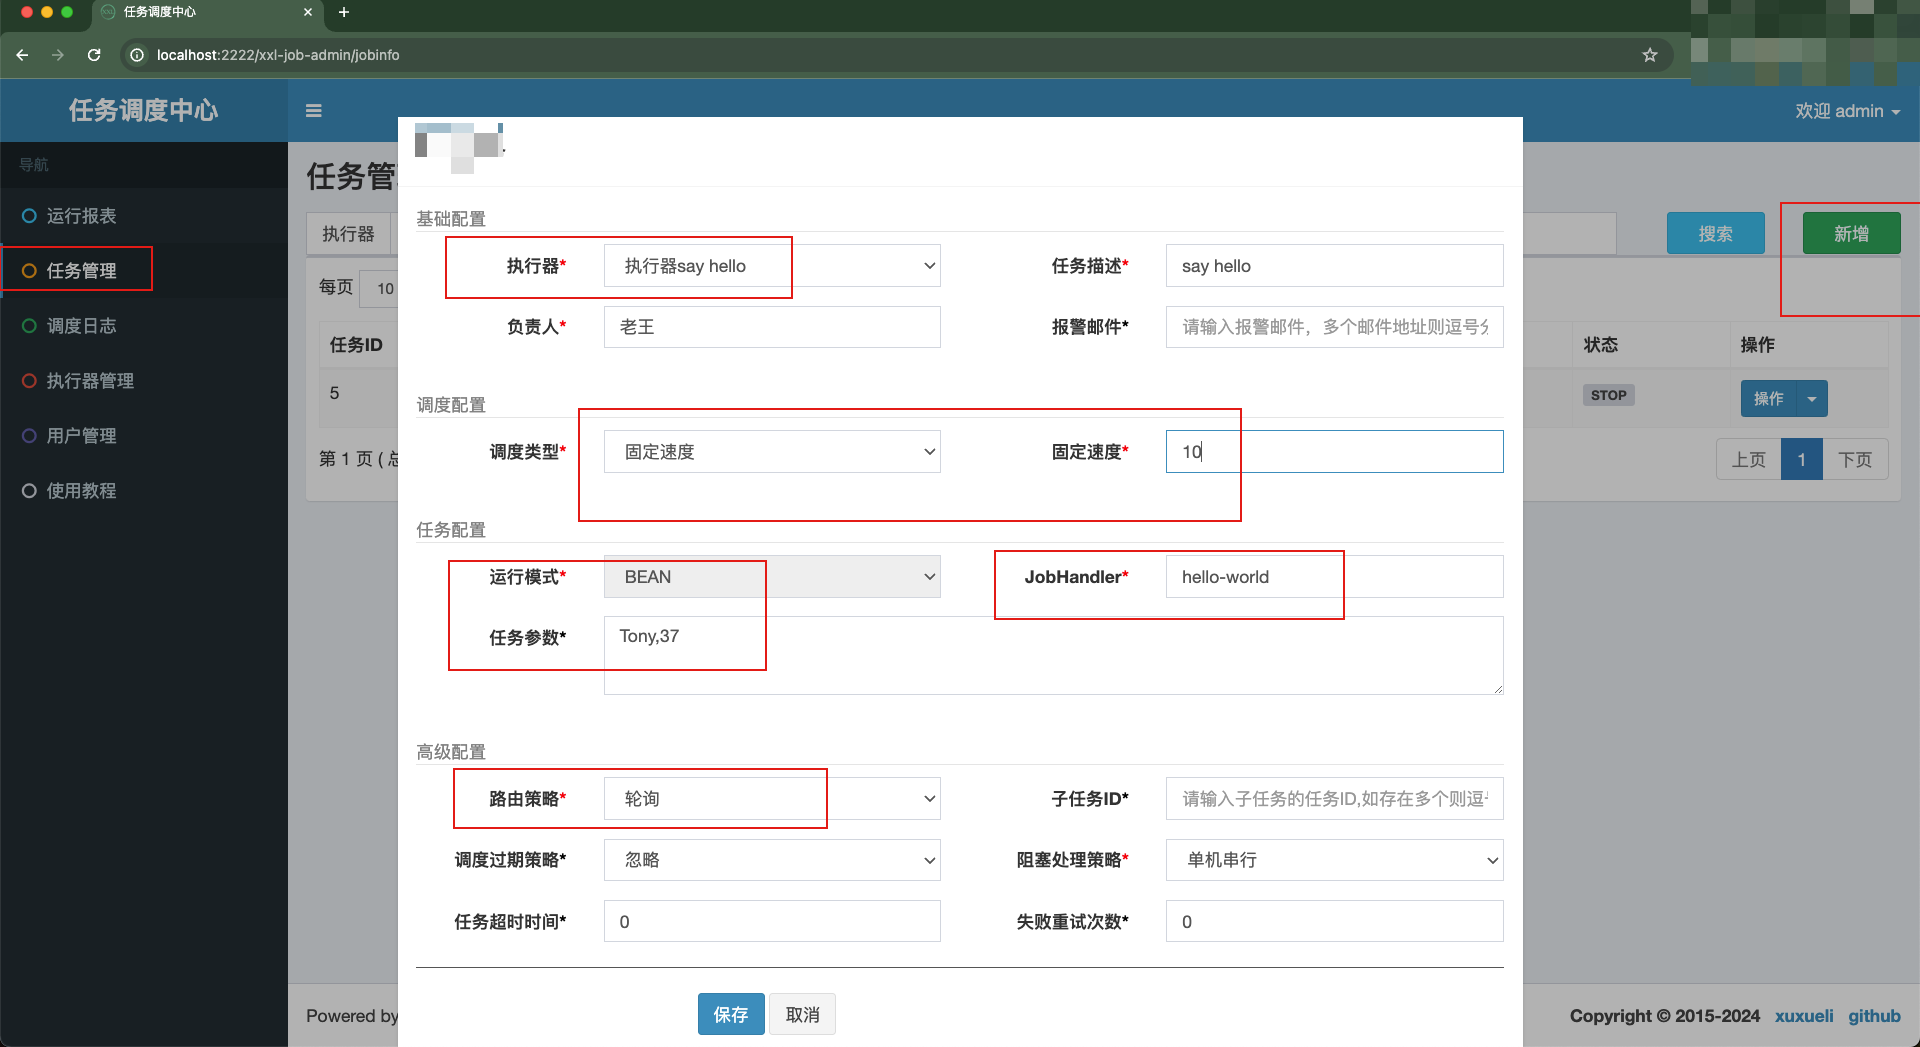
这里特别注意,任务添加后默认状态为STOP。我们需要手动启动,使其变为RUNNING状态。此时任务才会被调度
如上所示,我们在新增任务时指定来任务参数。故在代码中可通过XxlJobHelper.getJobParam()方法来获取。通过实例日志可以看出,结果符合预期
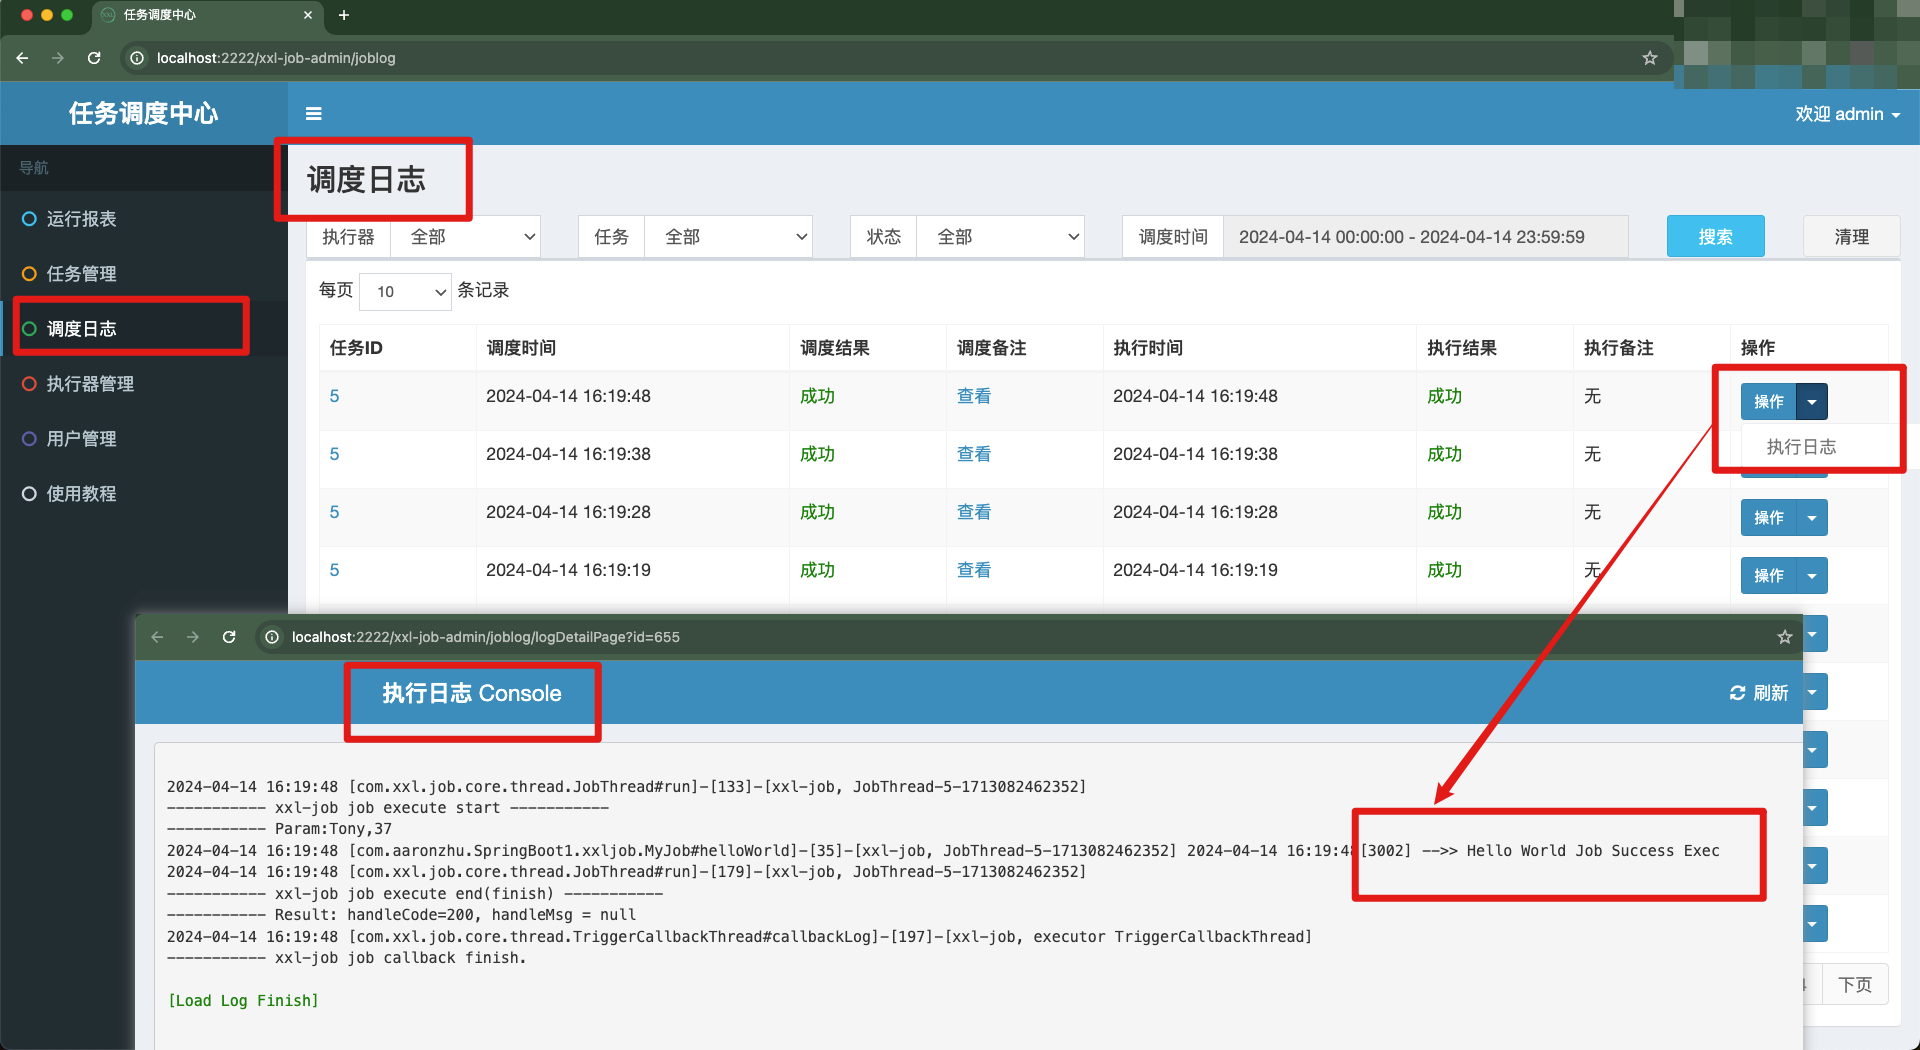
此外,我们还可以通过调度中心的web页面查看执行日志。但必须通过 XxlJobHelper.log()方法 来打印
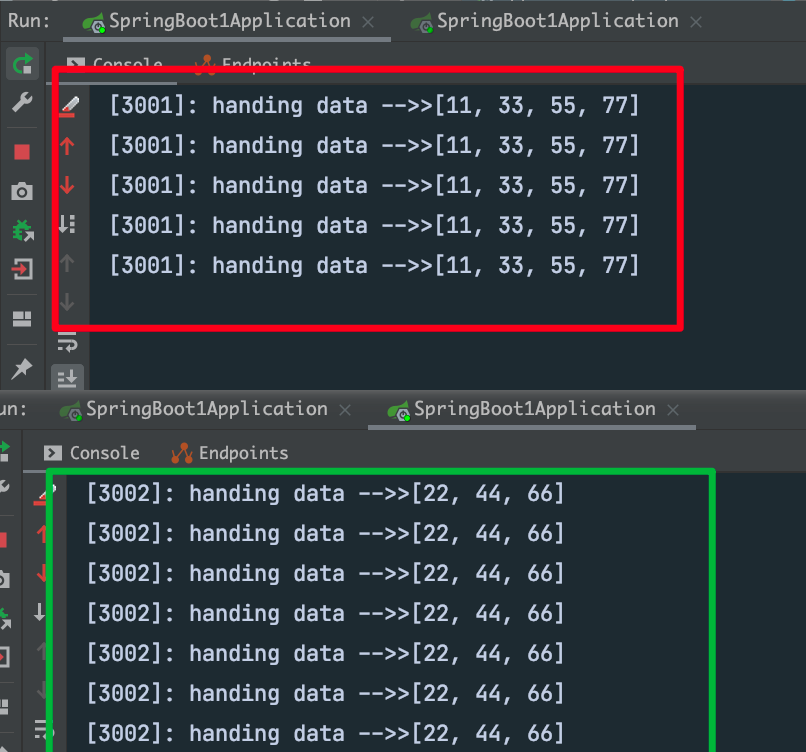
分片广播
xxl-job任务的路由策略支持分片广播。此时,一次任务调度会广播到该执行器分组下的所有执行器实例。同时系统会自动传递分片参数。其中,总分片数指的是该分组中执行器的总实例数;分片索引从0开始,表示该执行器分组中当前执行器实例的序号。使用该策略有下述两种场景:
- 分片场景:2个执行器实例共同处理一个大规模数据集。执行器实例借助分片参数对数据集进行分片处理,这样每个实例只需处理一半的数据
- 广播场景:典型任务有:广播执行器实例对缓存、配置等进行更新
1
2
3
4
5
6
7
8
9
10
11
12
13
14
15
16
17
18
19
20
21
22
23
24
25
26
| @Component
public class MyShardingJob {
private static List<Integer> allDatas = Arrays.asList(11,22,33,44,55,66,77);
@Value("${server.port}")
private Integer port;
@XxlJob(value = "handle-big-data")
public void handleBigData() {
int shardTotal = XxlJobHelper.getShardTotal();
int shardIndex = XxlJobHelper.getShardIndex();
List<Integer> toHandleDatas = new ArrayList<>();
for (int i = 0; i< allDatas.size(); i++) {
if( i%shardTotal == shardIndex ) {
toHandleDatas.add( allDatas.get(i) );
}
}
System.out.println("["+port+"]: handing data -->>" + toHandleDatas);
}
}
|
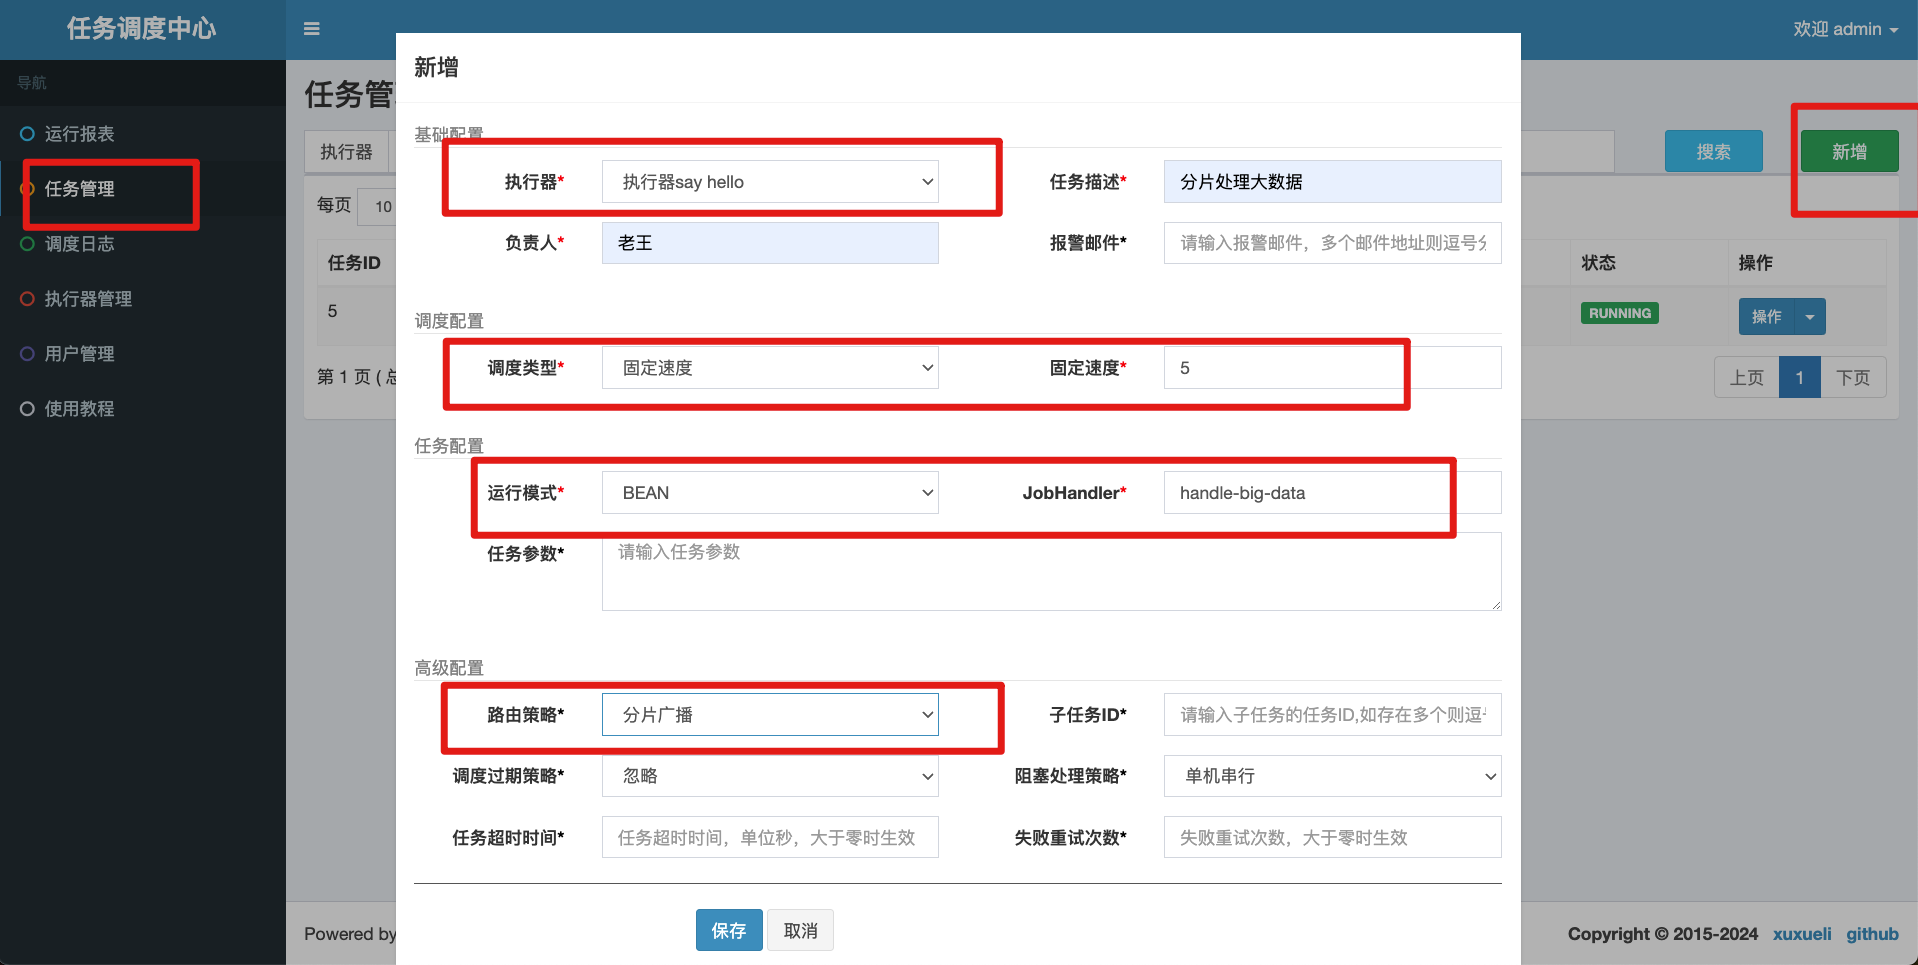
任务调度配置如下所示
测试结果如下所示