Nacos作为Alibaba开源的一款分布式中间件,其提供了丰富的能力。这里就其作为服务注册中心方面进行实践

配置Nacos服务
这里利用Docker搭建一个Nacos服务节点
1
2
3
| docker run -d -p 8848:8848 \
--env MODE=standalone \
--name Nacos-Service nacos/nacos-server:1.4.2
|
服务提供者
这里通过SpringBoot先搭建一个服务提供者——payment服务,首先引入Nacos依赖,如下所示
1
2
3
4
5
6
7
8
9
10
11
12
13
14
15
16
17
18
19
20
21
22
23
24
25
26
27
28
29
30
31
32
33
| <dependencyManagement>
<dependencies>
<dependency>
<groupId>org.springframework.boot</groupId>
<artifactId>spring-boot-dependencies</artifactId>
<version>2.2.2.RELEASE</version>
<type>pom</type>
<scope>import</scope>
</dependency>
<dependency>
<groupId>com.alibaba.cloud</groupId>
<artifactId>spring-cloud-alibaba-dependencies</artifactId>
<version>2.1.0.RELEASE</version>
<type>pom</type>
<scope>import</scope>
</dependency>
</dependencies>
</dependencyManagement>
<dependencies>
<dependency>
<groupId>com.alibaba.cloud</groupId>
<artifactId>spring-cloud-starter-alibaba-nacos-discovery</artifactId>
</dependency>
</dependencies>
|
配置如下所示
1
2
3
4
5
6
7
8
9
10
11
12
13
14
15
16
17
18
19
| server:
port: 8010
spring:
application:
name: payment
cloud:
nacos:
discovery:
server-addr: localhost:8848
management:
endpoints:
web:
exposure:
include: "*"
base-path: /actuator
|
然后这里提供一个Controller便于后续测试,如下所示
1
2
3
4
5
6
7
8
9
10
11
12
13
14
| @RestController
@RequestMapping("pay")
public class PaymentController {
@Value("${server.port}")
private String serverPort;
@GetMapping("/hello")
public String hello(@RequestParam String name) {
String msg = "[Payment Service-"+ serverPort +"]: " + name;
return msg;
}
}
|
最后在启动类上添加@EnableDiscoveryClient注解即可
1
2
3
4
5
6
7
| @SpringBootApplication
@EnableDiscoveryClient
public class PaymentApplication {
public static void main(String[] args) {
SpringApplication.run(PaymentApplication.class, args);
}
}
|
服务消费者
同理,我们继续搭建一个服务消费者——order服务。这里关于Nacos的依赖及配置不再赘述,其与payment服务相同。下面同样添加一个Controller用于测试,同时配置了一个添加了@LoadBalanced注解的RestTemplate实例
1
2
3
4
5
6
7
8
9
10
11
12
13
14
15
16
17
18
19
20
21
22
23
24
25
26
27
28
29
30
31
32
33
34
35
36
| @RestController
@RequestMapping("order")
public class OrderController {
@Qualifier("restTemplate2")
@Autowired
private RestTemplate restTemplate2;
public static final String PAYMENT_URL = "http://payment";
@GetMapping("/test2")
public String test2(@RequestParam String name) {
String msg = restTemplate2.getForObject(PAYMENT_URL+"/pay/hello?name={1}", String.class, name);
String result = "[Order Service #test2]: " + msg;
return result;
}
}
...
@Configuration
public class RestTemplateConfig {
@Bean
@LoadBalanced
public RestTemplate restTemplate2() {
return new RestTemplate();
}
}
|
最后在启动类上添加@EnableDiscoveryClient注解即可
测试
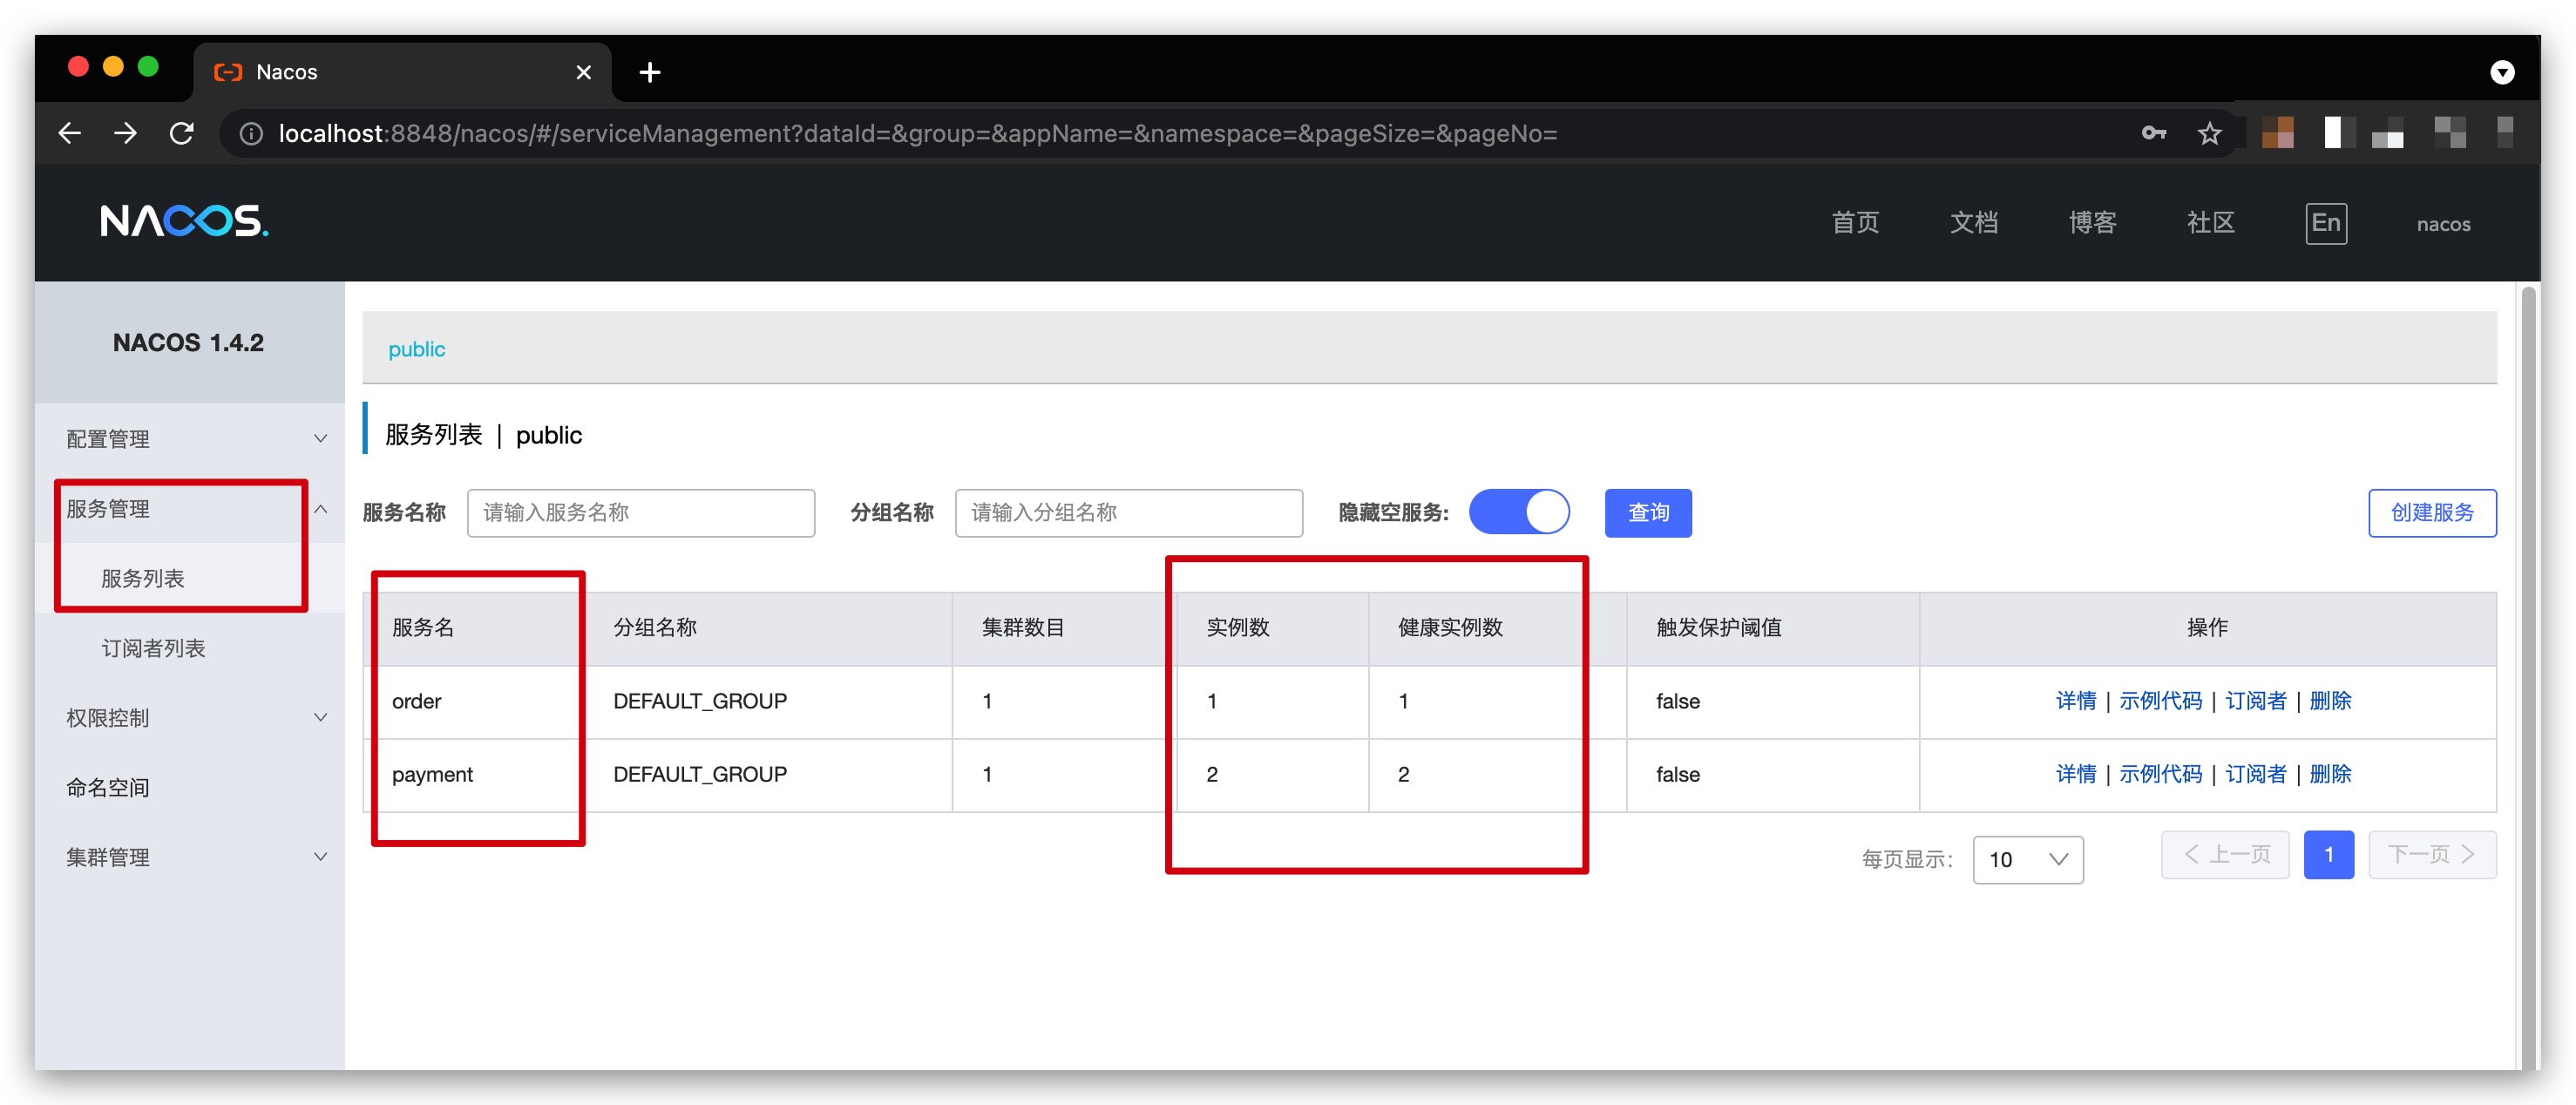
这里,我们分别在8010、8011端口启动两个payment服务的实例。然后在86端口启动order服务实例。进入Nacos的Web管理页面 http://localhost:8848/nacos ,其中缺省用户名、密码均为nacos。如下所示,可以看到服务实例均注册成功

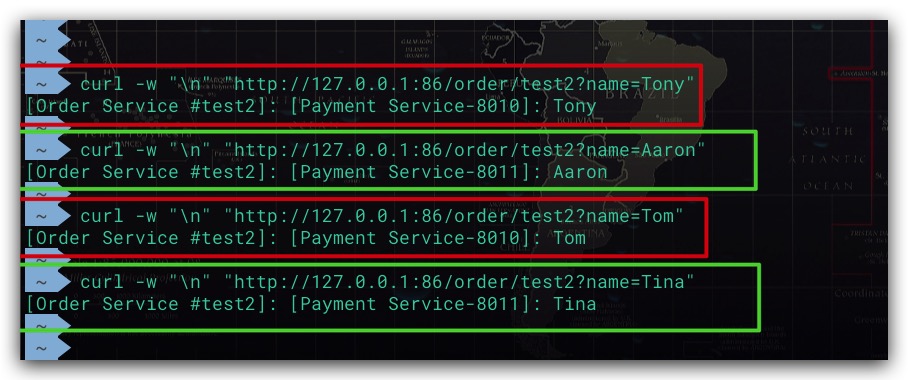
现在向order服务发起请求,测试结果如下,符合预期

从测试结果可以看出,Nacos默认支持负载均衡。究其原因,其依赖了Ribbon
Note
Nacos支持AP、CP两种模型,可根据实际使用场景按需选择、切换


