ZooKeeper作为分布式协调组件,也可以作为SpringCloud下的注册中心进行使用

配置ZooKeeper
通过Docker先建立一个ZooKeeper服务
1
2
3
4
5
6
7
|
docker pull zookeeper
docker run -p 2181:2181 -d \
--name ZooKeeper-Service \
zookeeper
|
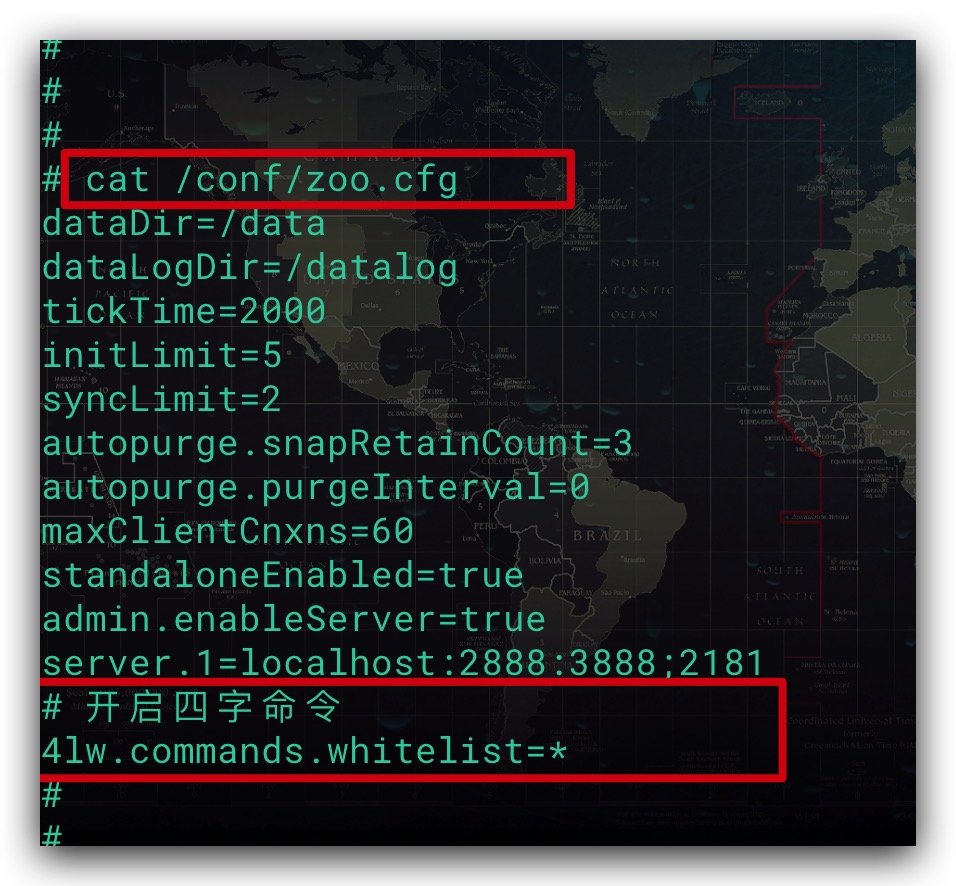
进入ZooKeeper容器,在/conf/zoo.cfg文件中添加下述内容,以开启四字命令。然后重启ZooKeeper容器
1
2
|
4lw.commands.whitelist=*
|
如下所示
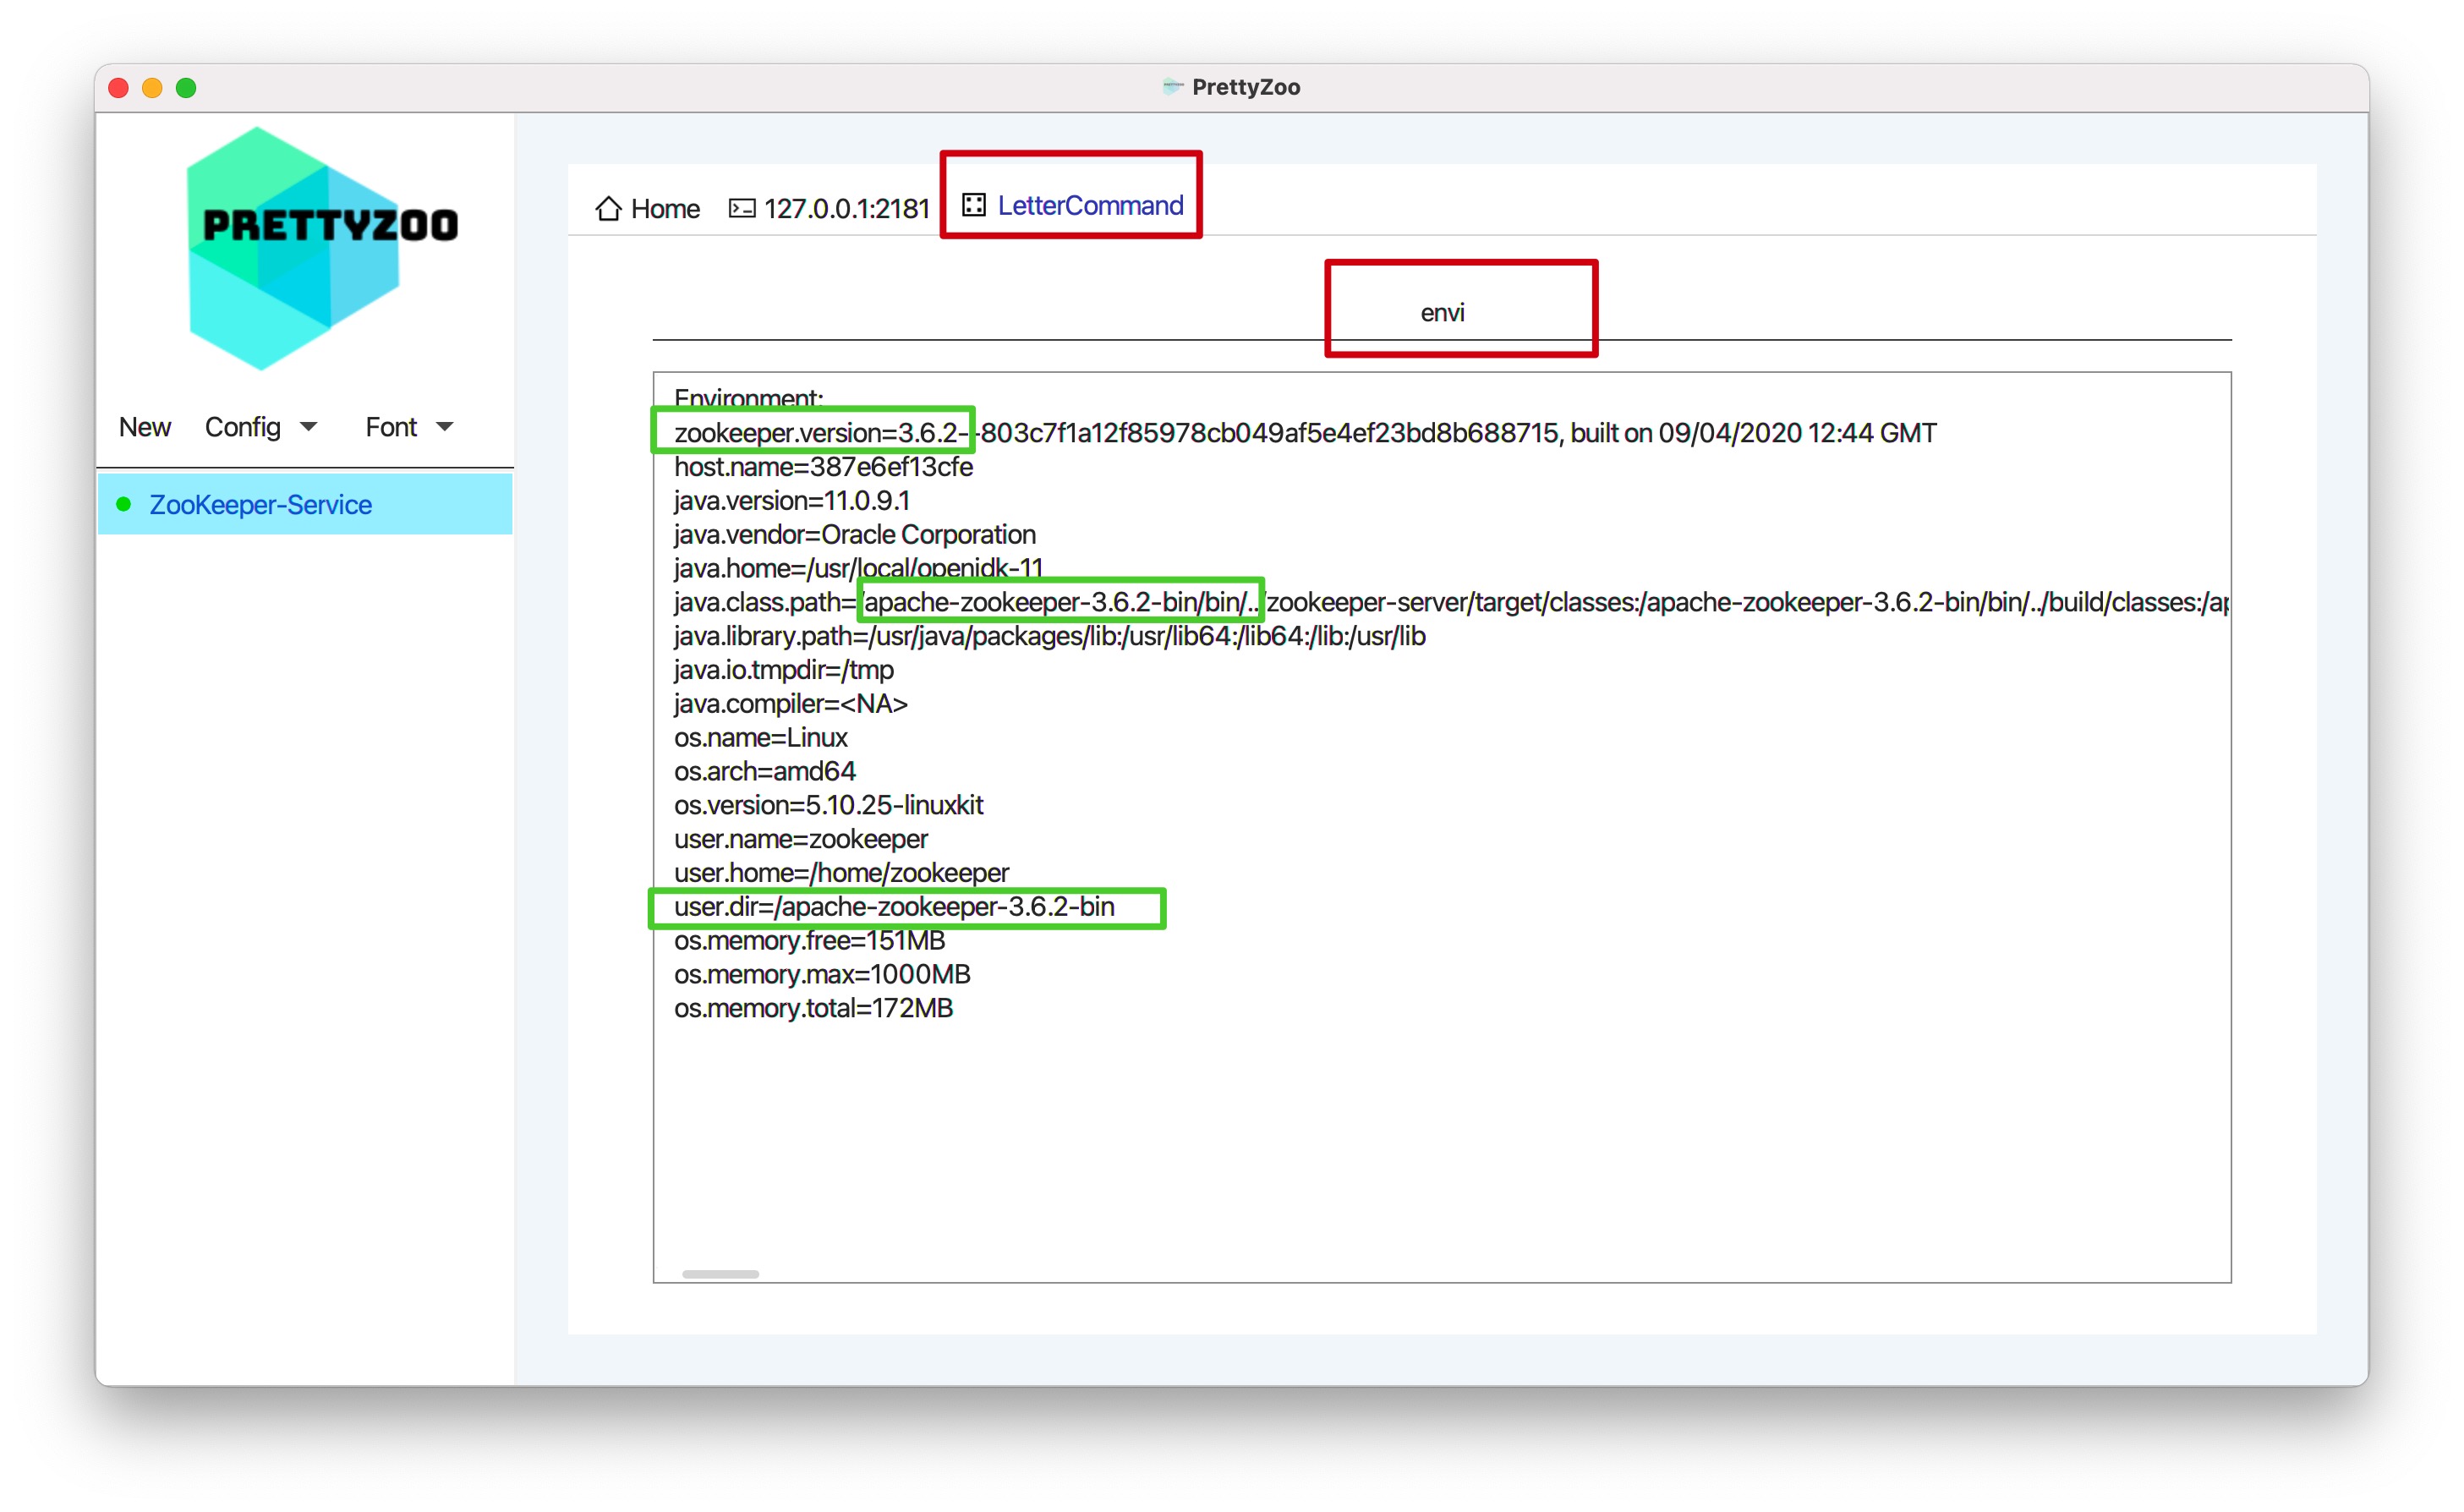
现在,通过ZooKeeper客户端PrettyZoo执行四字命令envi来进一步明确ZooKeeper版本信息——其版本为3.6.2,如下所示
搭建服务提供者
POM依赖
这里我们建立一个SpringBoot项目——payment,作为服务的提供者。对于ZooKeeper作为注册中心的场景,在SpringCloud直接使用spring-cloud-starter-zookeeper-discovery依赖即可。需要注意的是:
- Zookeeper依赖的版本需与我们的所使用服务端版本保持一致, 故需从spring-cloud-starter-zookeeper-discovery排除该依赖,并显式引入3.6.2版本的Zookeeper依赖
- Zookeeper日志依赖与SpringBoot日志依赖冲突, 故需这里排除前者的日志依赖
1
2
3
4
5
6
7
8
9
10
11
12
13
14
15
16
17
18
19
20
21
22
23
24
25
26
27
28
29
30
31
32
33
34
35
36
37
38
39
40
41
42
43
44
45
46
47
48
49
50
51
52
53
54
| <dependencyManagement>
<dependencies>
<dependency>
<groupId>org.springframework.boot</groupId>
<artifactId>spring-boot-dependencies</artifactId>
<version>2.2.2.RELEASE</version>
<type>pom</type>
<scope>import</scope>
</dependency>
<dependency>
<groupId>org.springframework.cloud</groupId>
<artifactId>spring-cloud-dependencies</artifactId>
<version>Hoxton.SR1</version>
<type>pom</type>
<scope>import</scope>
</dependency>
</dependencies>
</dependencyManagement>
<dependencies>
<dependency>
<groupId>org.springframework.cloud</groupId>
<artifactId>spring-cloud-starter-zookeeper-discovery</artifactId>
<exclusions>
<exclusion>
<groupId>org.apache.zookeeper</groupId>
<artifactId>zookeeper</artifactId>
</exclusion>
</exclusions>
</dependency>
<dependency>
<groupId>org.apache.zookeeper</groupId>
<artifactId>zookeeper</artifactId>
<version>3.6.2</version>
<exclusions>
<exclusion>
<groupId>org.slf4j</groupId>
<artifactId>slf4j-log4j12</artifactId>
</exclusion>
</exclusions>
</dependency>
</dependencies>
|
配置文件
配置文件中只需通过spring.cloud.zookeeper.connect-string配置项指定ZooKeeper服务地址信息即可
1
2
3
4
5
6
7
8
9
10
11
12
13
14
15
16
17
18
|
spring:
application:
name: payment
profiles:
active: payment3
---
spring:
profiles: payment3
cloud:
zookeeper:
connect-string: 127.0.0.1:2181
server:
port: 8003
|
Java实现
简便起见,这里我们直接提供了一个Controller,用于测试
1
2
3
4
5
6
7
8
9
10
11
12
13
14
| @RestController
@RequestMapping("pay")
public class PaymentController {
@Value("${server.port}")
private String serverPort;
@GetMapping("/hello")
public String hello(@RequestParam String name) {
String msg = "[Payment Service-"+ serverPort +"]: " + name;
return msg;
}
}
|
然后在启动类上添加 @EnableDiscoveryClient 注解即可
1
2
3
4
5
6
7
8
9
| import org.springframework.cloud.client.discovery.EnableDiscoveryClient;
@SpringBootApplication
@EnableDiscoveryClient
public class PaymentApplication {
public static void main(String[] args) {
SpringApplication.run(PaymentApplication.class, args);
}
}
|
搭建服务消费者
配置文件
类似地,我们还建立一个SpringBoot项目——order,作为服务消费者。由于其POM依赖与服务提供者的POM依赖并无二致。故这里不再赘述,直接复制即可。配置文件同理,如下所示
1
2
3
4
5
6
7
8
9
10
11
12
13
14
15
16
17
| spring:
application:
name: order
profiles:
active: order2
---
spring:
profiles: order2
cloud:
zookeeper:
connect-string: 127.0.0.1:2181
server:
port: 81
|
Java实现
首先声明创建RestTemplate实例。一个是普通的RestTemplate实例,一个则是添加了 @LoadBalanced 注解的RestTemplate实例。前者可进行基于IP、Port服务调用;后者由于添加了 @LoadBalanced 注解,其一方面可进行基于服务名的服务调用,另一方面支持负载均衡
1
2
3
4
5
6
7
8
9
10
11
12
13
14
15
16
17
18
19
20
21
22
23
24
25
| @Configuration
public class RestTemplateConfig {
@Bean
public RestTemplate restTemplate1() {
return new RestTemplate();
}
@Bean
@LoadBalanced
public RestTemplate restTemplate2() {
return new RestTemplate();
}
}
|
然后通过Controller调用Payment服务接口。下面展现了 传统地基于IP、Port信息 和 基于服务名 两种形式的服务调用
1
2
3
4
5
6
7
8
9
10
11
12
13
14
15
16
17
18
19
20
21
22
23
24
25
26
27
28
29
30
31
32
33
| @RestController
@RequestMapping("order")
public class OrderController {
public static final String PAYMENT_URL_1 = "http://localhost:8003";
public static final String PAYMENT_URL_2 = "http://payment";
@Qualifier("restTemplate1")
@Autowired
private RestTemplate restTemplate1;
@Qualifier("restTemplate2")
@Autowired
private RestTemplate restTemplate2;
@GetMapping("/test1")
public String test1(@RequestParam String name) {
String msg = restTemplate1.getForObject(PAYMENT_URL_1 +"/pay/hello?name={1}", String.class, name);
String result = "[Order Service #test1]: " + msg;
return result;
}
@GetMapping("/test2")
public String test2(@RequestParam String name) {
String msg = restTemplate2.getForObject(PAYMENT_URL_2 +"/pay/hello?name={1}", String.class, name);
String result = "[Order Service #test2]: " + msg;
return result;
}
}
|
最后,在启动类上添加 @EnableDiscoveryClient 注解
1
2
3
4
5
6
7
8
9
| import org.springframework.cloud.client.discovery.EnableDiscoveryClient;
@SpringBootApplication
@EnableDiscoveryClient
public class OrderApplication {
public static void main(String[] args) {
SpringApplication.run(OrderApplication.class, args);
}
}
|
测试
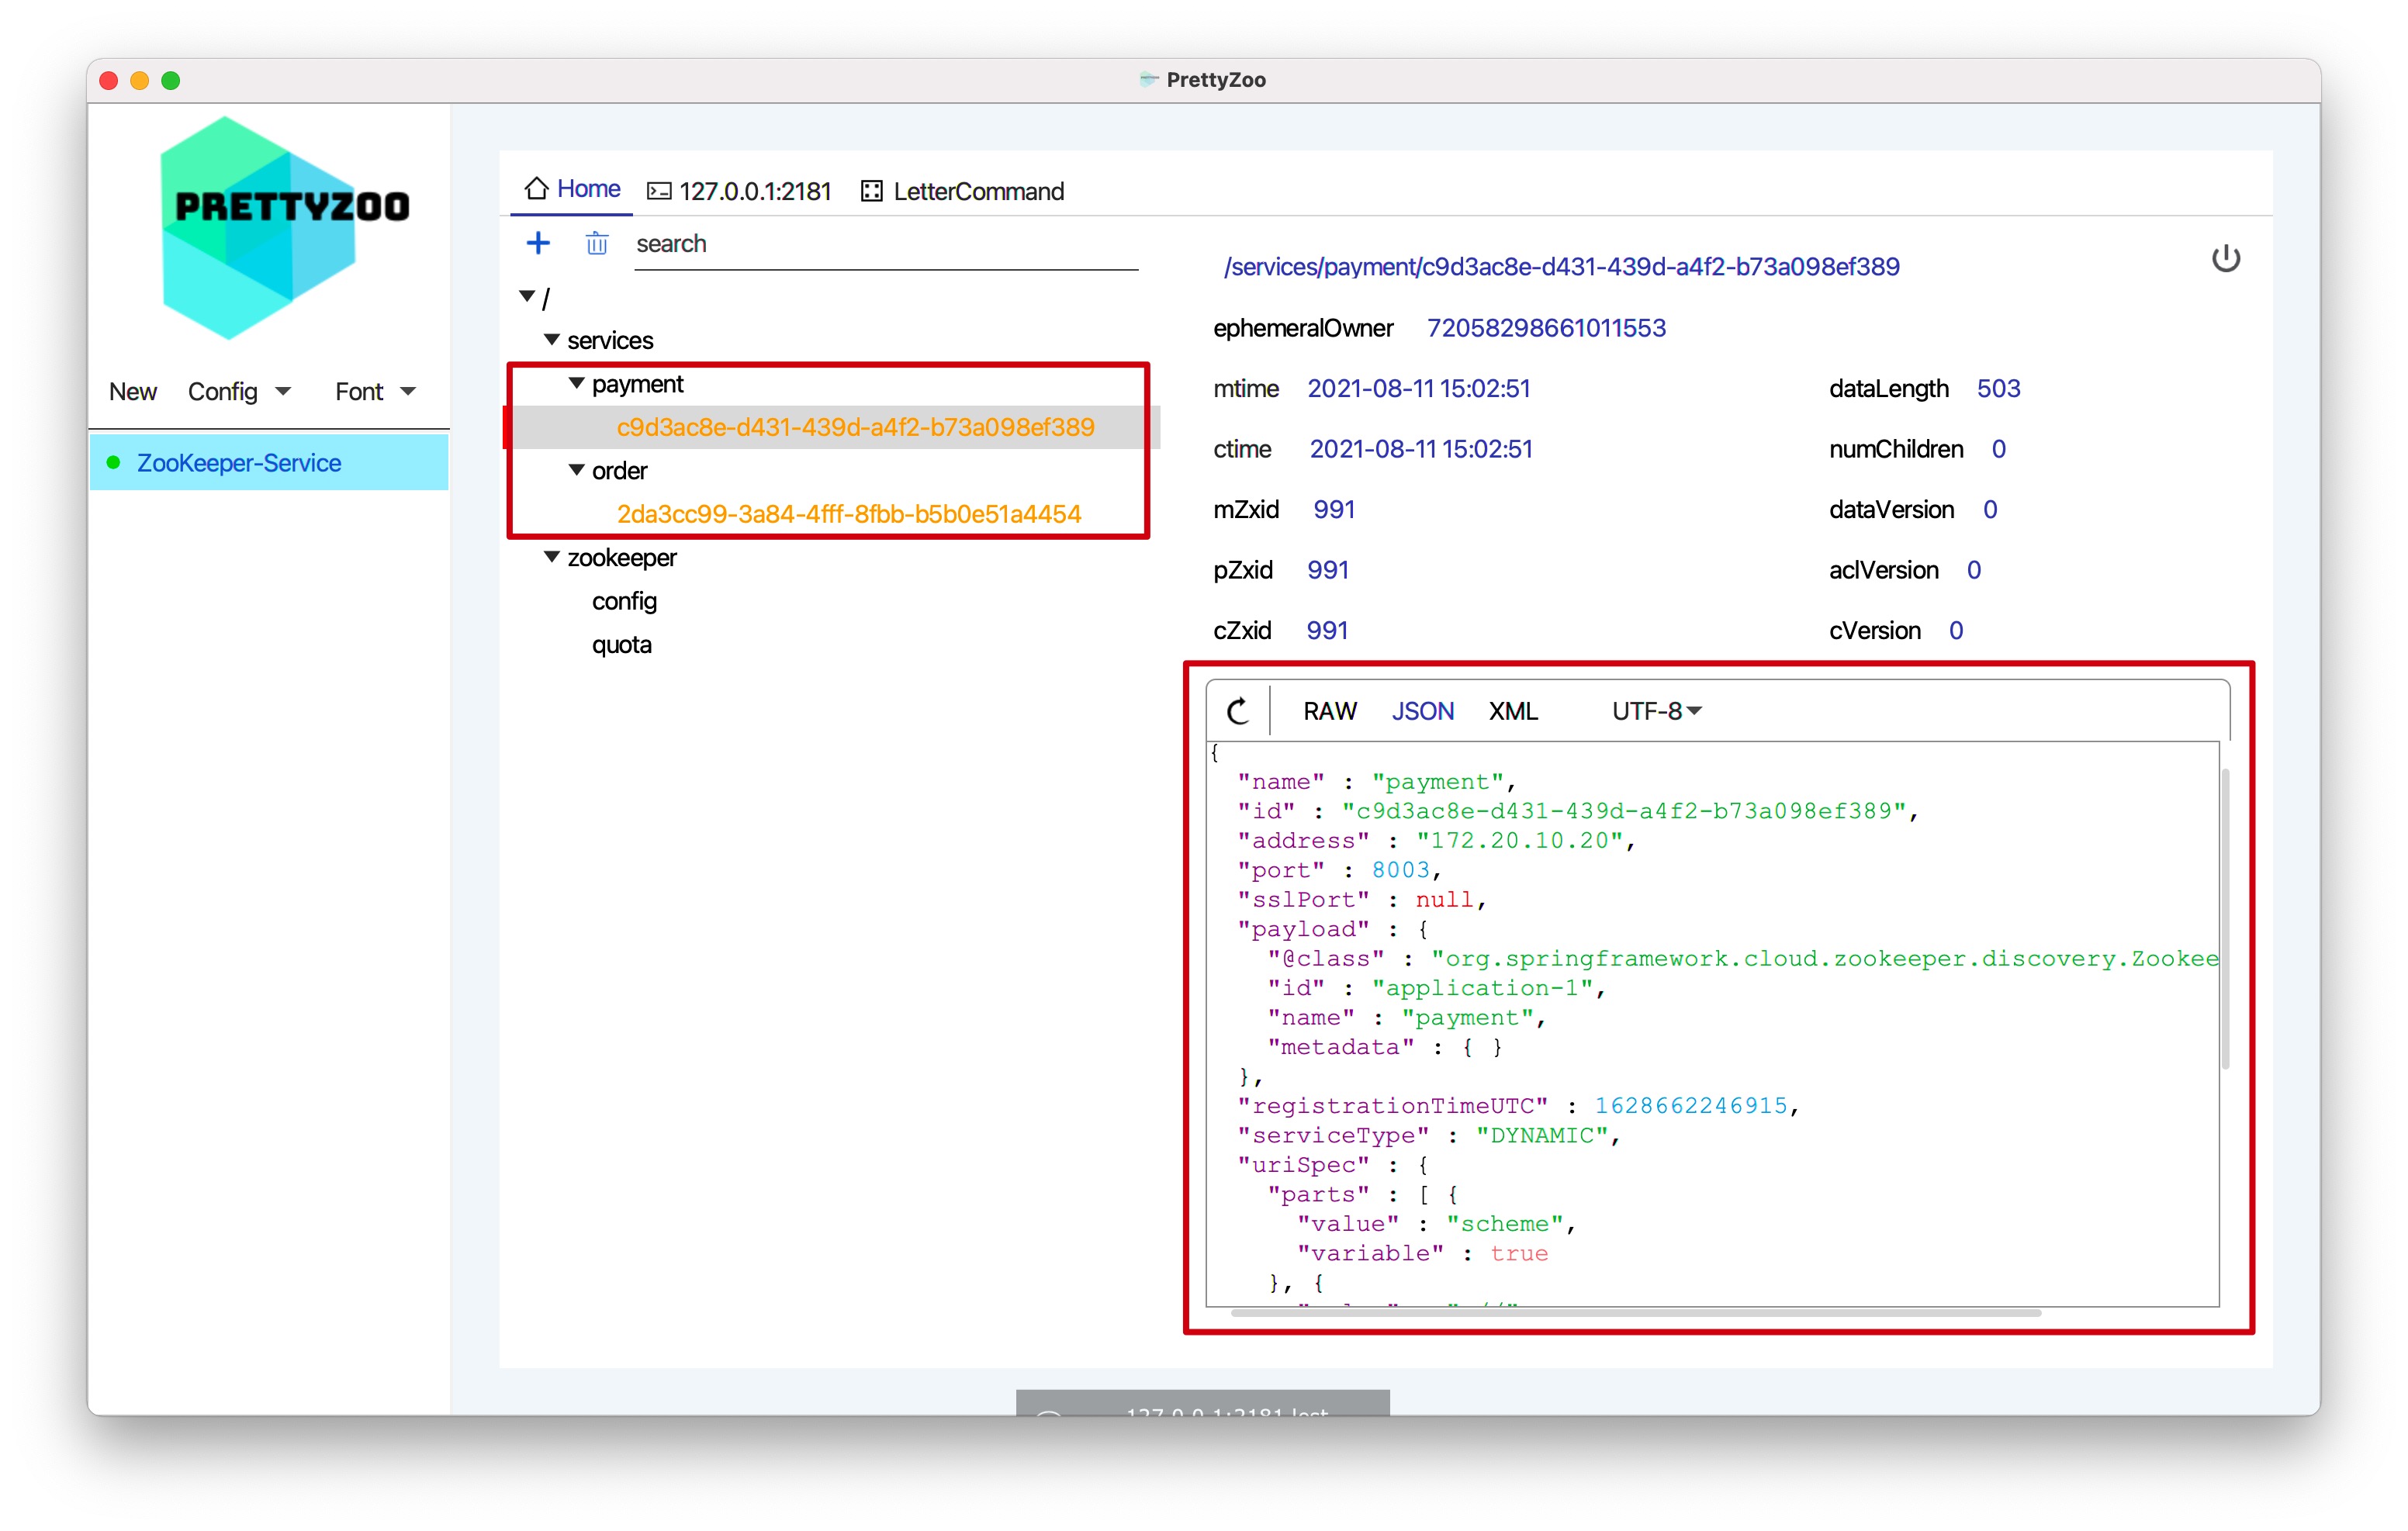
启动payment、order服务,通过ZooKeeper客户端PrettyZoo可以看出均注册成功
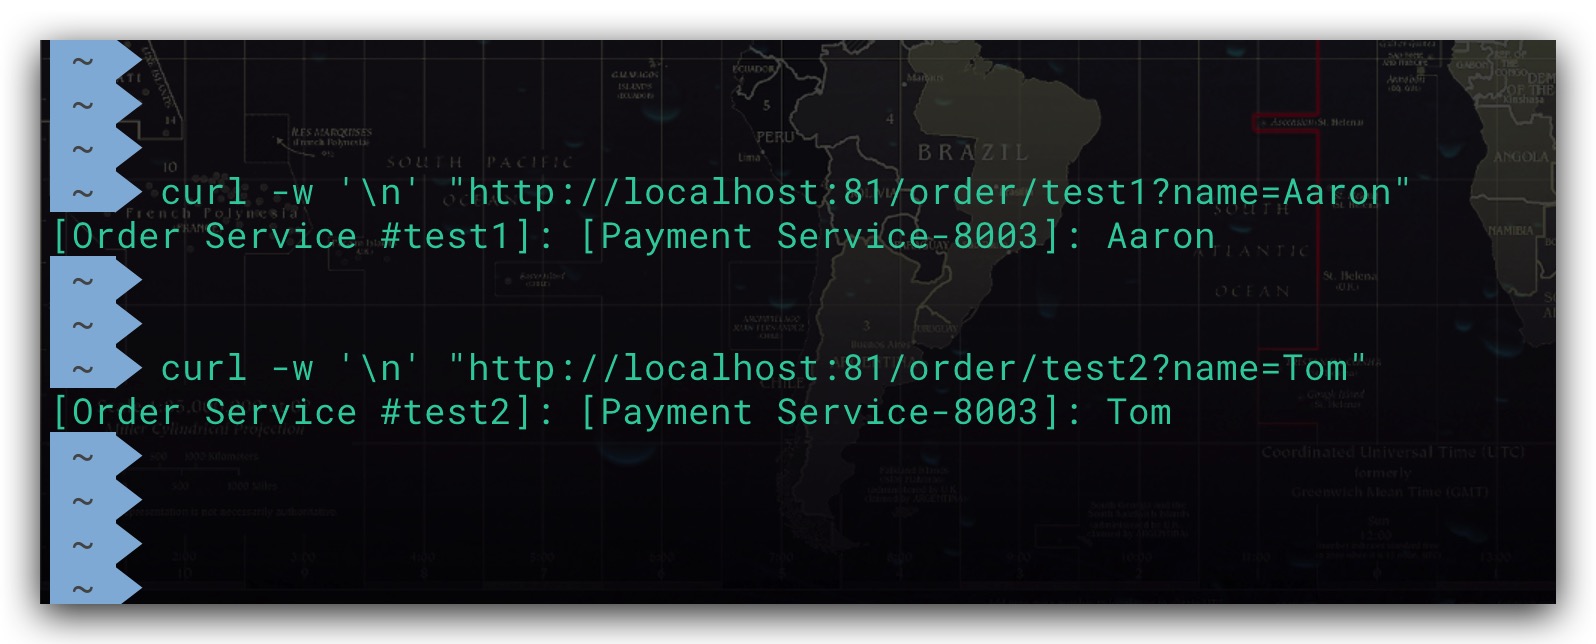
然后通过curl验证测试,服务调用正常符合预期,如下所示
参考文献
- Spring微服务实战 John Carnell著
